First, install Terraform, and if you’re not too familiar with it - here is a good introductory video to it and its+ concepts.
Basically Terraform is infrastructure provision as code, and you define the end result you want, rather than writing the steps to accomplish the end result. You’ll want to use a tool like Ansible to configure (in code) your infrastructure after it’s been provisioned.
There are just a few main concepts in Terraform (summarised from the above video):
refresh: query infrastructure provider to get current stateplan: create an execution plan to reach end goalapply: execute plan to reach end goaldestroy: reverse all the execution to destroy resources/infrastructure
Introduction
To summarise what we want to accomplish:
- Create an S3 bucket which will allow us to host a static website
- Create a CNAME entry in Cloudflare to use a vanity URL
In a new folder create a create-site.tf file. The name isn’t super important.
The terraform file consists of a few blocks
Required Providers
|
|
The first part of the file is just to load the providers, allowing us easy access to the API’s of the infrastructure.
After adding a new provider you will need to run terraform init.
Configuring AWS Provider
|
|
This part will configure the AWS integration. More details on the authentication for this provider.
I used aws configure. From configure the configuration in Terraform for AWS infrastructure.
$ aws configure
AWS Access Key ID [None]: [redacted]
AWS Secret Access Key [None]: [redacted]
Default region name [None]: eu-west-2
Default output format [None]:
Note although you configure the default region in aws configure, it still seems to required here.
Configuring Cloudflare Provider
|
|
The Cloudflare configuration. More details on the authentication for this provider.
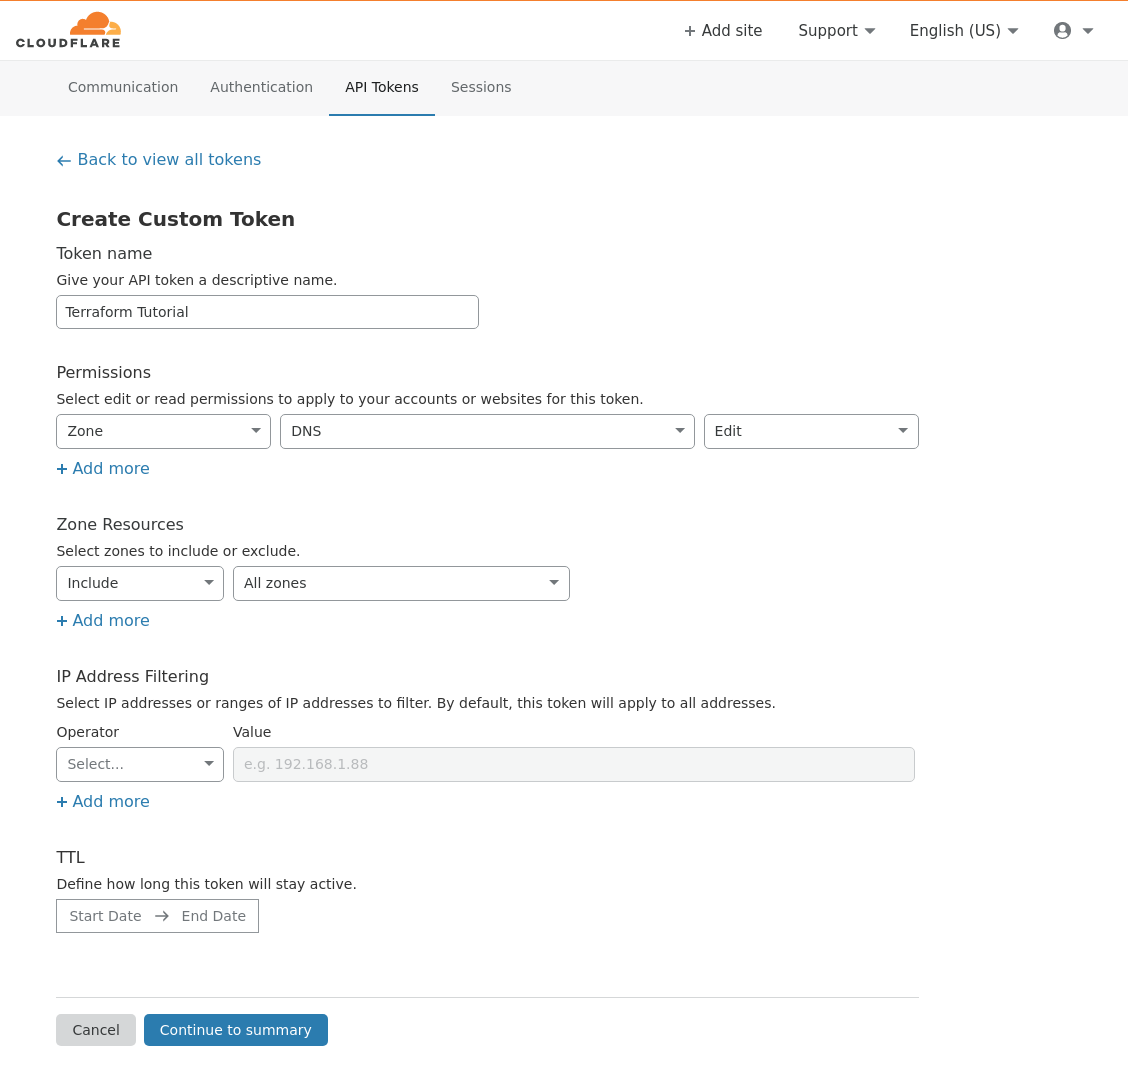
You’ll need to create an API token in Cloudflare with Edit DNS permissions.

Recommendation: You should change the api_token to be read from environment variable or as an input variable (when running terraform [plan|apply]).
e.g. add input variable:
|
|
|
|
Then:
terraform plan \
    -var 'cloudflare_api_token=CLOUDFLARE_API_TOKEN_FROM_CLI'
or with environment variable
|
|
TF_VAR_cloudflare_api_token="CLOUDFLARE_API_TOKEN_FROM_CLI" \
    terraform plan
Setting Local Variable for S3 Bucket Name
When we create a new bucket, we will want to set a couple of tags:
site: e.g.ac93.ukenvironment: e.g.production
To prevent duplication, we’ll want to set site tag to be that of the bucket name.
However, we can’t reference an attribute within the same block.
Error: Self-referential block
We’ll use this variable for:
- Creating bucket with this name
- Creating bucket tag
It also makes doing other steps, such as adding a policy to reference the bucket name. However, this aws_s3_bucket resource will have attributes accessible afterward, and some of these are id, i,e, locals.bucket and the arn for the bucket.
|
|
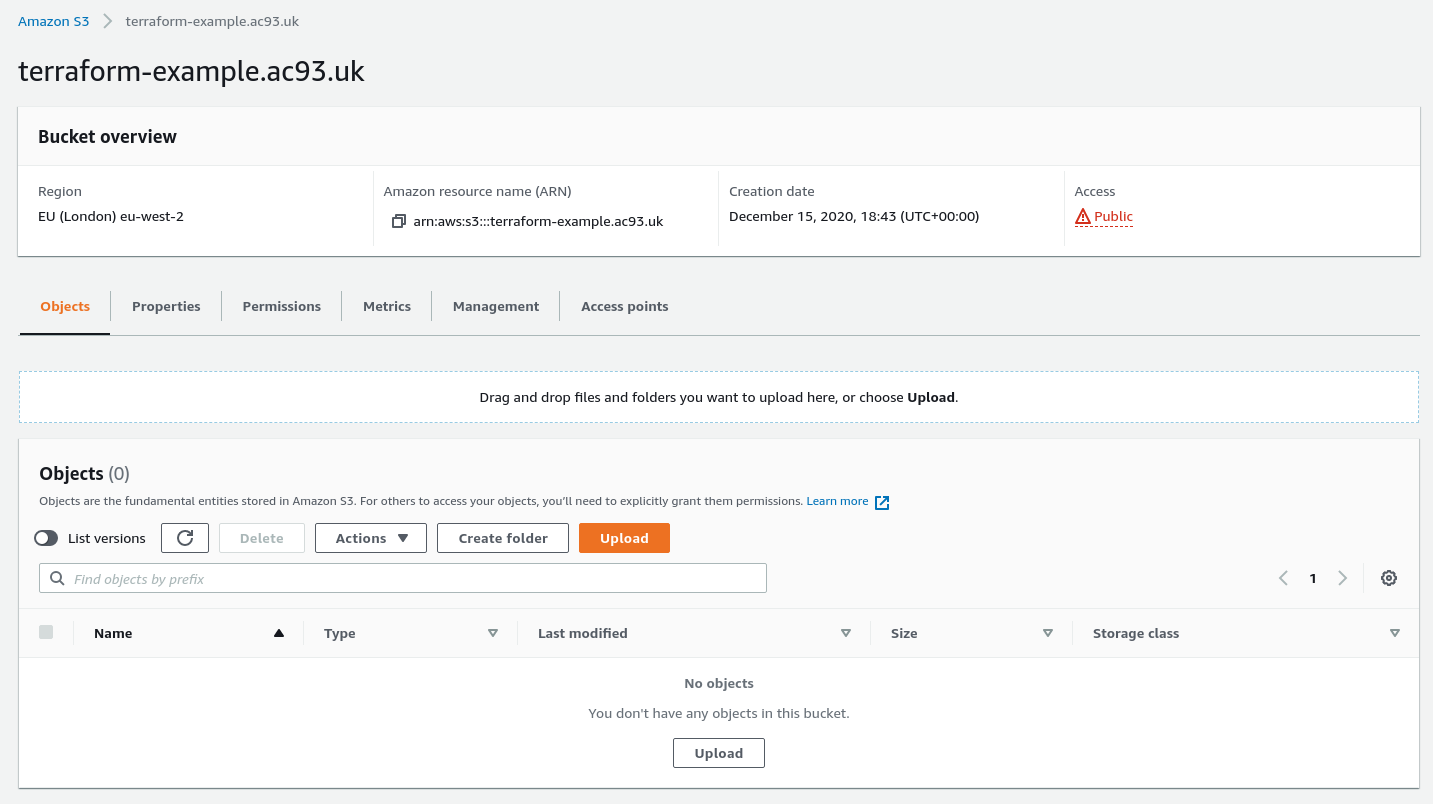
Creating a new S3 Bucket for Static Site Hosting
Using the aws_s3_bucket resource, the configuration will set some tags, enable versioning, and set index and error documents. The documents are configured for default Nuxt builds.
|
|
Getting Zone ID for Cloudflare Domain
Thanks to the Cloudlfare zone data source it’s possible to lookup the zone ID for a domain. The zone ID is required for adding a DNS entry in the final step.
|
|
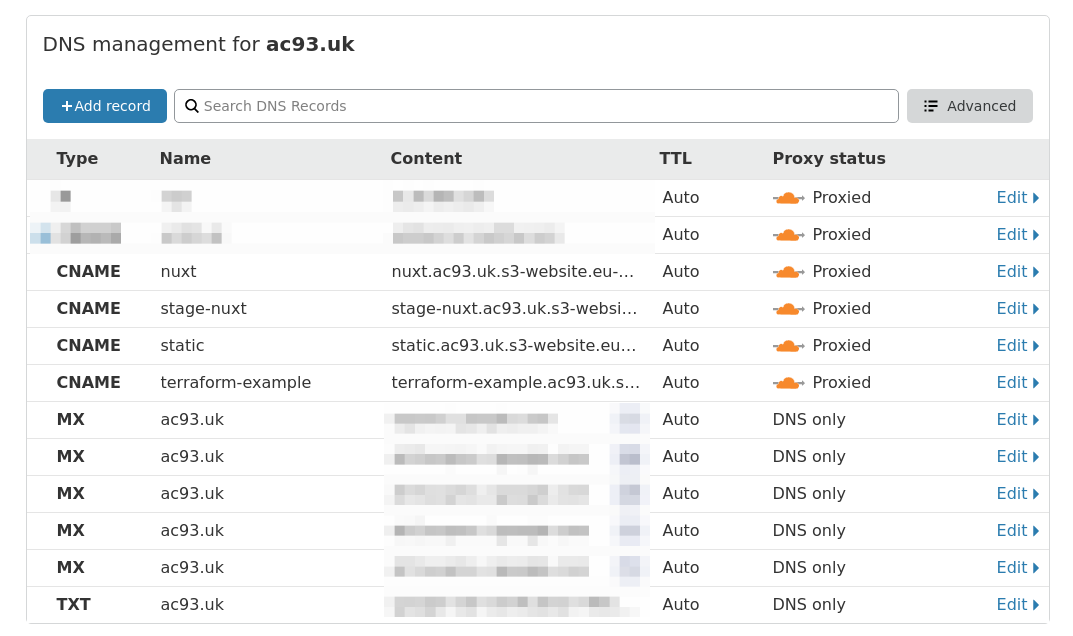
Creating a CNAME Vanity URL to S3 Bucket
Using the Cloudflare record resource and the aws_s3_bucket.bucket_regional_domain_name attribute to create a new CNAME entry to the bucket.
|
|
Terraform Commands
Most of the script I’ve covered is in this gist
$ terraform validate
Success! The configuration is valid.
Once verified the file is valid, follow the commands below, and you’ll have the infrastructure!
terraform init
To download the latest providers:
$ terraform init

Initializing the backend...

Initializing provider plugins...
- Reusing previous version of hashicorp/aws from the dependency lock file
- Reusing previous version of cloudflare/cloudflare from the dependency lock file
- Installing hashicorp/aws v2.70.0...
- Installed hashicorp/aws v2.70.0 (signed by HashiCorp)
- Installing cloudflare/cloudflare v2.14.0...
- Installed cloudflare/cloudflare v2.14.0 (signed by a HashiCorp partner, key ID DE413CEC881C3283)

Partner and community providers are signed by their developers.
If you'd like to know more about provider signing, you can read about it here:
https://www.terraform.io/docs/plugins/signing.html

Terraform has been successfully initialized!

You may now begin working with Terraform. Try running "terraform plan" to see
any changes that are required for your infrastructure. All Terraform commands
should now work.

If you ever set or change modules or backend configuration for Terraform,
rerun this command to reinitialize your working directory. If you forget, other
commands will detect it and remind you to do so if necessary.
terraform plan
To preform a dry run:
$ terraform plan

An execution plan has been generated and is shown below.
Resource actions are indicated with the following symbols:
  + create

Terraform will perform the following actions:

  # aws_s3_bucket.terraform_bucket will be created
  + resource "aws_s3_bucket" "terraform_bucket" {
      + acceleration_status         = (known after apply)
      + acl                         = "public-read"
      + arn                         = (known after apply)
      + bucket                      = "terraform-example.ac93.uk"
      + bucket_domain_name          = (known after apply)
      + bucket_regional_domain_name = (known after apply)
      + force_destroy               = false
      + hosted_zone_id              = (known after apply)
      + id                          = (known after apply)
      + region                      = (known after apply)
      + request_payer               = (known after apply)
      + tags                        = {
          + "environment" = "production"
          + "site"        = "terraform-example.ac93.uk"
        }
      + website_domain              = (known after apply)
      + website_endpoint            = (known after apply)

      + versioning {
          + enabled    = true
          + mfa_delete = false
        }

      + website {
          + error_document = "200.html"
          + index_document = "index.html"
        }
    }

  # cloudflare_record.terraform_bucket_cname will be created
  + resource "cloudflare_record" "terraform_bucket_cname" {
      + created_on  = (known after apply)
      + hostname    = (known after apply)
      + id          = (known after apply)
      + metadata    = (known after apply)
      + modified_on = (known after apply)
      + name        = "terraform-example"
      + proxiable   = (known after apply)
      + proxied     = true
      + ttl         = (known after apply)
      + type        = "CNAME"
      + value       = (known after apply)
      + zone_id     = "[redacted]"
    }

Plan: 2 to add, 0 to change, 0 to destroy.

------------------------------------------------------------------------

Note: You didn't specify an "-out" parameter to save this plan, so Terraform
can't guarantee that exactly these actions will be performed if
"terraform apply" is subsequently run.
terraform apply
To deploy and run the plan on the infrastructure:
$ terraform apply -auto-approve
aws_s3_bucket.terraform_bucket: Creating...
aws_s3_bucket.terraform_bucket: Creation complete after 3s [id=terraform-example.ac93.uk]
cloudflare_record.terraform_bucket_cname: Creating...
cloudflare_record.terraform_bucket_cname: Creation complete after 3s [id=f4ec094962e05664fcf2ed4fb3169556]

Apply complete! Resources: 2 added, 0 changed, 0 destroyed.
You’ll just have to take my word, but it worked!


Idempotency
Unless you run terraform destroy you shouldn’t lose any data or changes to the current infrastructure. Terraform will create the infrastructure to be as defined in the scripts.
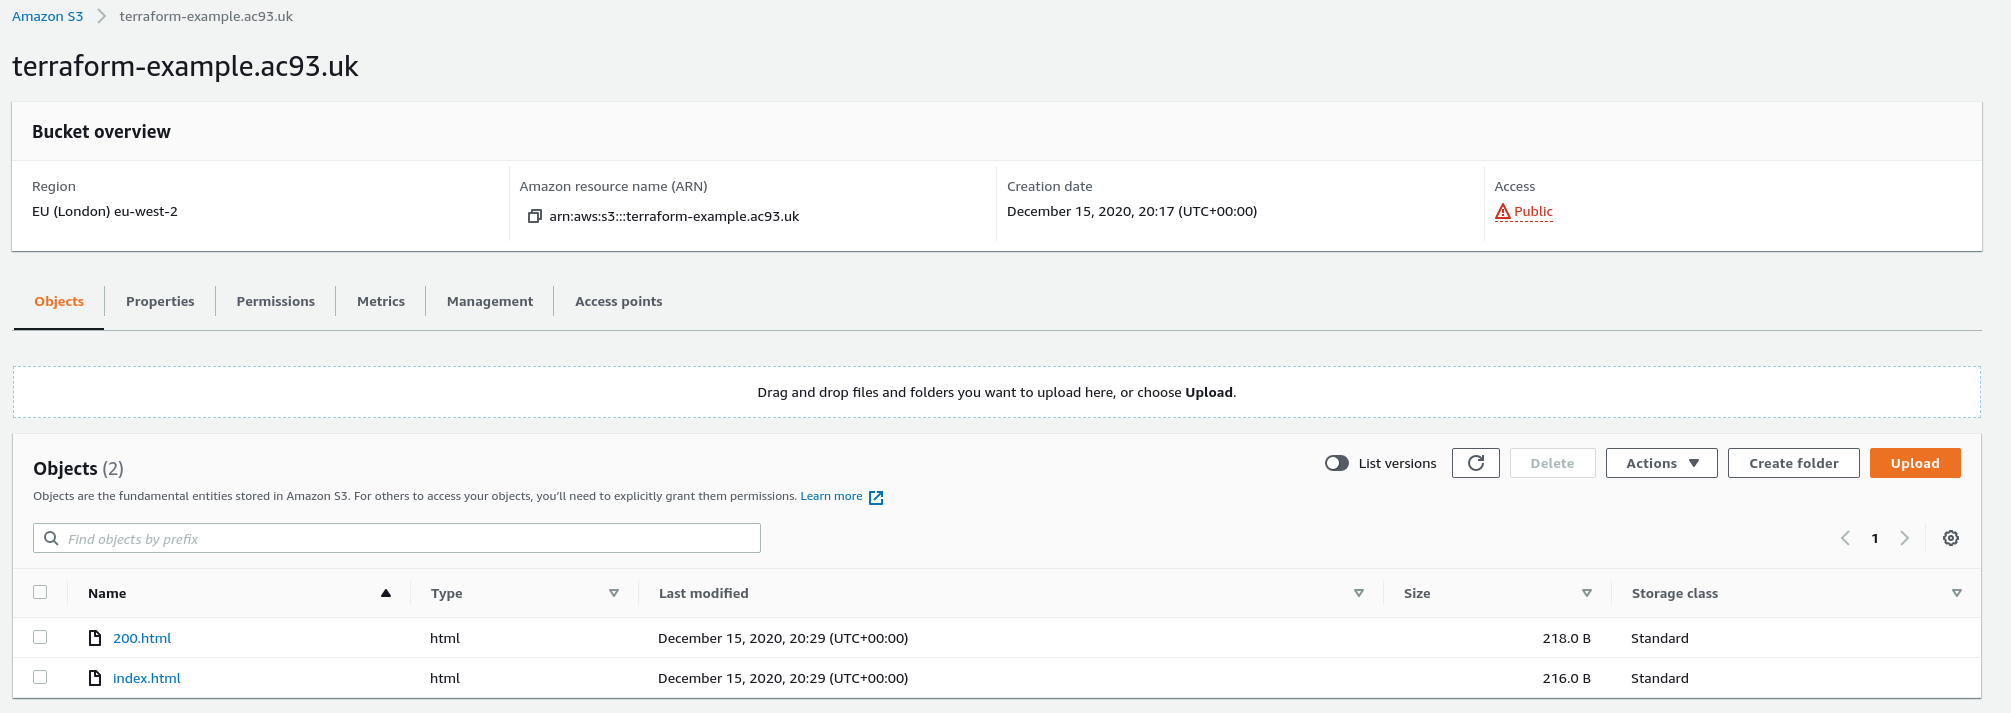
Uploading Files to S3
This isn’t part of Terraform, but just to complete the example.
$ aws s3 cp index.html s3://terraform-example.ac93.uk/index.html
upload: ./index.html to s3://terraform-example.ac93.uk/index.html

$ aws s3 cp 200.html s3://terraform-example.ac93.uk/200.html
upload: ./200.html to s3://terraform-example.ac93.uk/200.html

Hmm, these aren’t available.

AWS PERMISSION!
Bucket Policy
Need to attach a Bucket Policy. No worries though!
|
|
|
|
|
|
Failure to plan is planning to fail.
$ terraform plan
aws_s3_bucket.terraform_bucket: Refreshing state... [id=terraform-example.ac93.uk]
cloudflare_record.terraform_bucket_cname: Refreshing state... [id=f4ec094962e05664fcf2ed4fb3169556]

An execution plan has been generated and is shown below.
Resource actions are indicated with the following symbols:
  + create

Terraform will perform the following actions:

  # aws_s3_bucket_policy.terraform_bucket_policy will be created
  + resource "aws_s3_bucket_policy" "terraform_bucket_policy" {
      + bucket = "terraform-example.ac93.uk"
      + id     = (known after apply)
      + policy = jsonencode(
            {
              + Statement = [
                  + {
                      + Action    = [
                          + "s3:GetObject",
                          + "s3:GetObjectVersion",
                        ]
                      + Effect    = "Allow"
                      + Principal = "*"
                      + Resource  = [
                          + "arn:aws:s3:::terraform-example.ac93.uk/*",
                        ]
                      + Sid       = "PublicRead"
                    },
                ]
              + Version   = "2012-10-17"
            }
        )
    }

Plan: 1 to add, 0 to change, 0 to destroy.

------------------------------------------------------------------------

Note: You didn't specify an "-out" parameter to save this plan, so Terraform
can't guarantee that exactly these actions will be performed if
"terraform apply" is subsequently run.
Running the last piece of the puzzle.
aws_s3_bucket.terraform_bucket: Refreshing state... [id=terraform-example.ac93.uk]
cloudflare_record.terraform_bucket_cname: Refreshing state... [id=f4ec094962e05664fcf2ed4fb3169556]
aws_s3_bucket_policy.terraform_bucket_policy: Creating...
aws_s3_bucket_policy.terraform_bucket_policy: Creation complete after 1s [id=terraform-example.ac93.uk]

Apply complete! Resources: 1 added, 0 changed, 0 destroyed.
Demo
The end result of running the gist: terraform-example.ac93.uk
