Rationale: I maintain various, mostly brochureware sites which are hosted on an EC2 instance. This server needs regular
checks and maintenance, but as these are fairly simple websites, we should look to move them into a static site generator
(I will use nuxt in this tutorial, although that’s not too important) and have some CI/CD setup to build and deploy the site.
This means at least one server fewer to check, maintain and pay for, plus effortless deployments!
A bit of effort to set up, but well worth it.
I will cover:
- Setting up S3 buckets, users, policies
- Setting up Bitbucket Pipeline environments to hold our S3 API secrets
- Setting up Bitbucket Pipeline for staging and production branches
- Setting up
CNAMECloudlfare
AWS
I will create two buckets:
static.ac93.uk- this will be production site, later will configure this web address in Cloudflare to point to the bucketstage-static.ac93.uk- this will be the staging site, same as production, will configure in Cloudflare later.
S3
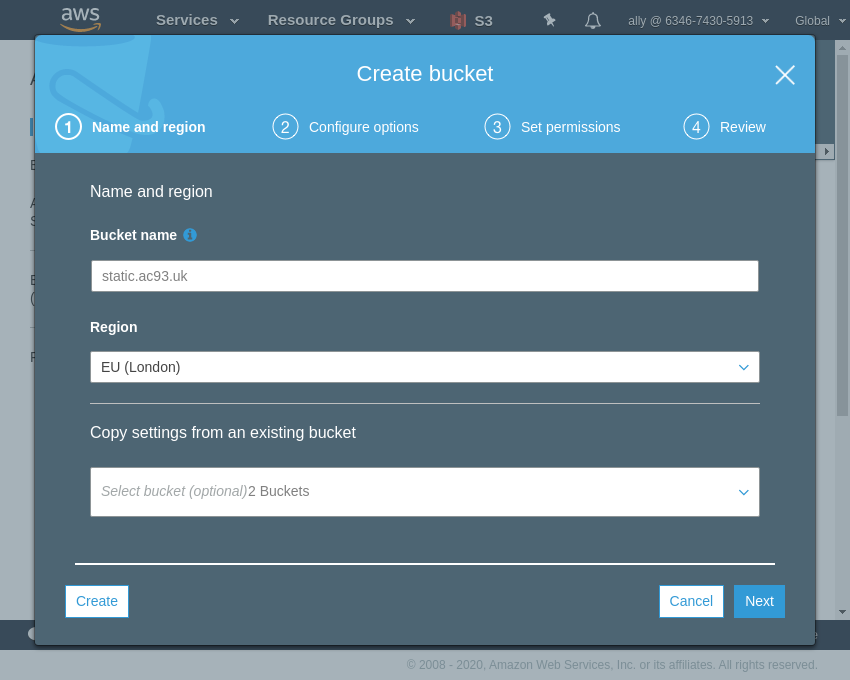
Give the bucket a name. Note: my example is static.ac93.uk and can be accessed at static.ac93.uk.s3-website.eu-west-2.amazonaws.com.
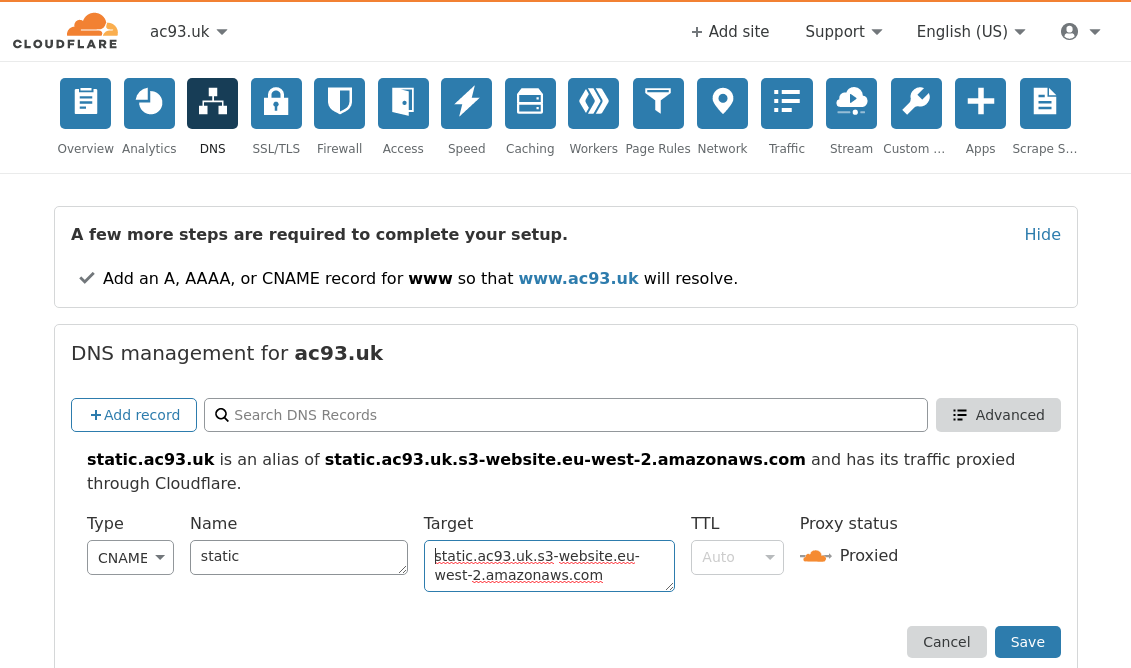
We can configure our domain by adding static as a CNAME to static.ac93.uk.s3-website.eu-west-2.amazonaws.com.
However, we cannot name one stage.static.ac93.uk as this causes issues with SSL in Cloudflare later on.
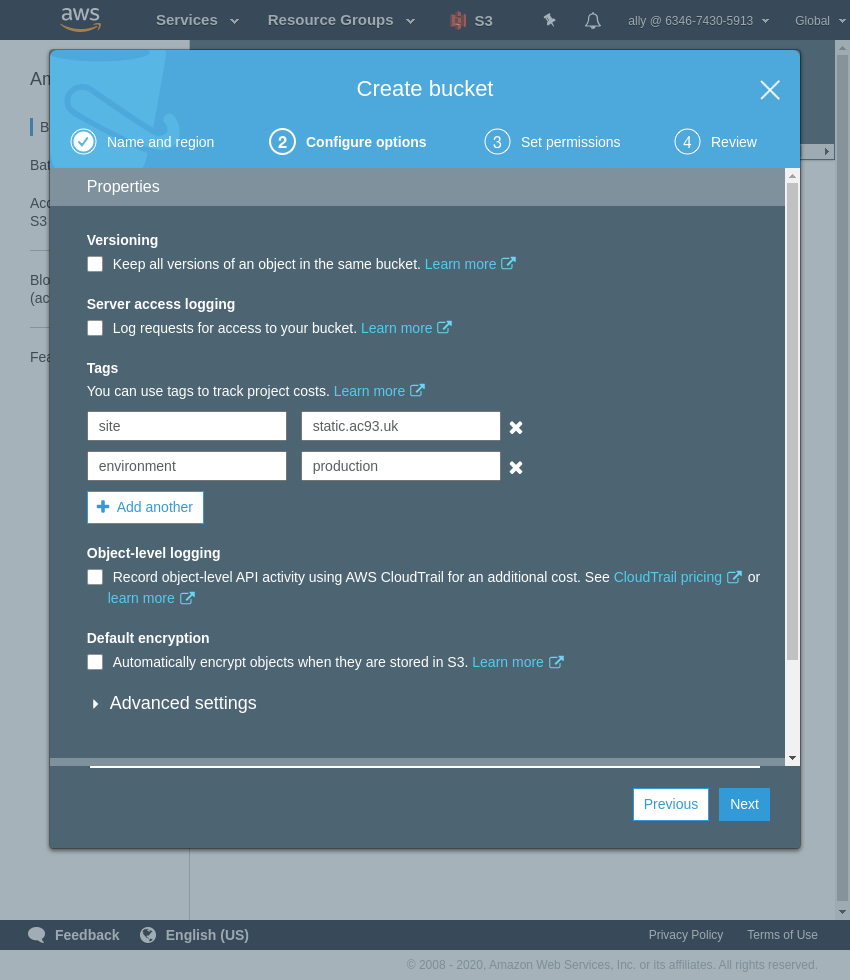
I didn’t really add anything on options section. Just added some tags which could help later.
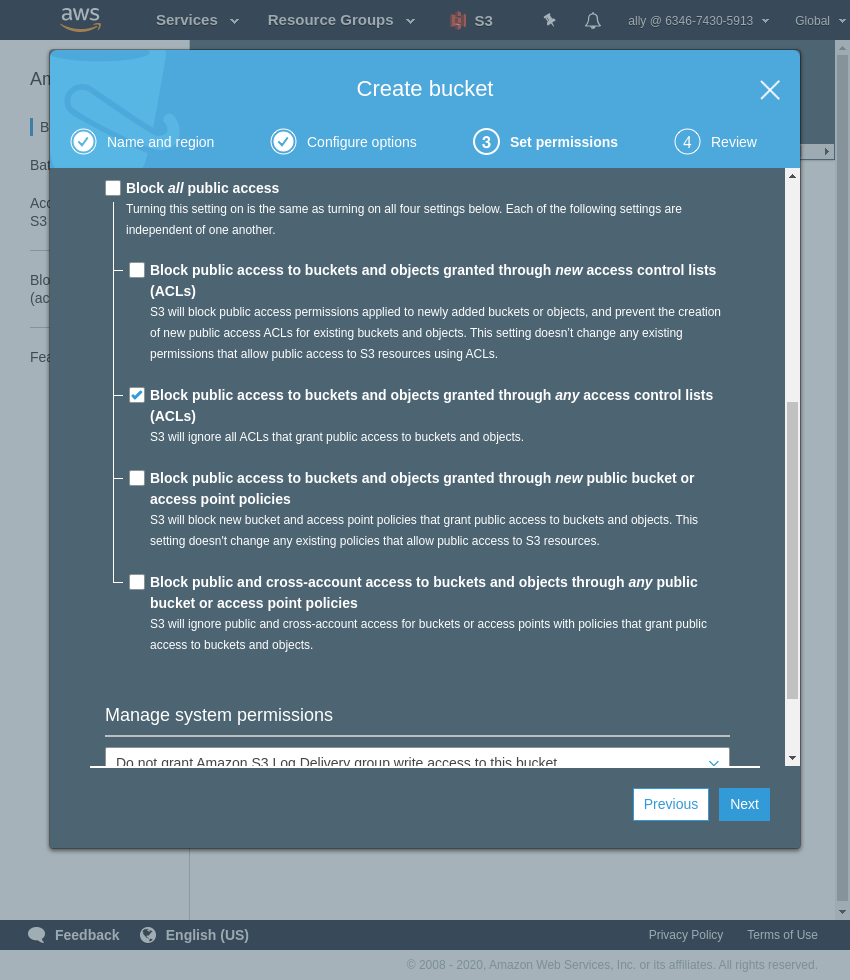
I do not block all public access.
I only check:
- Block public access to buckets and objects granted through any access control lists
We will add a policy to the bucket later to only allow certain IPs, e.g. only from Cloudflare (proxied DNS), Bitbucket Pipelines servers or only our office/staff, etc.
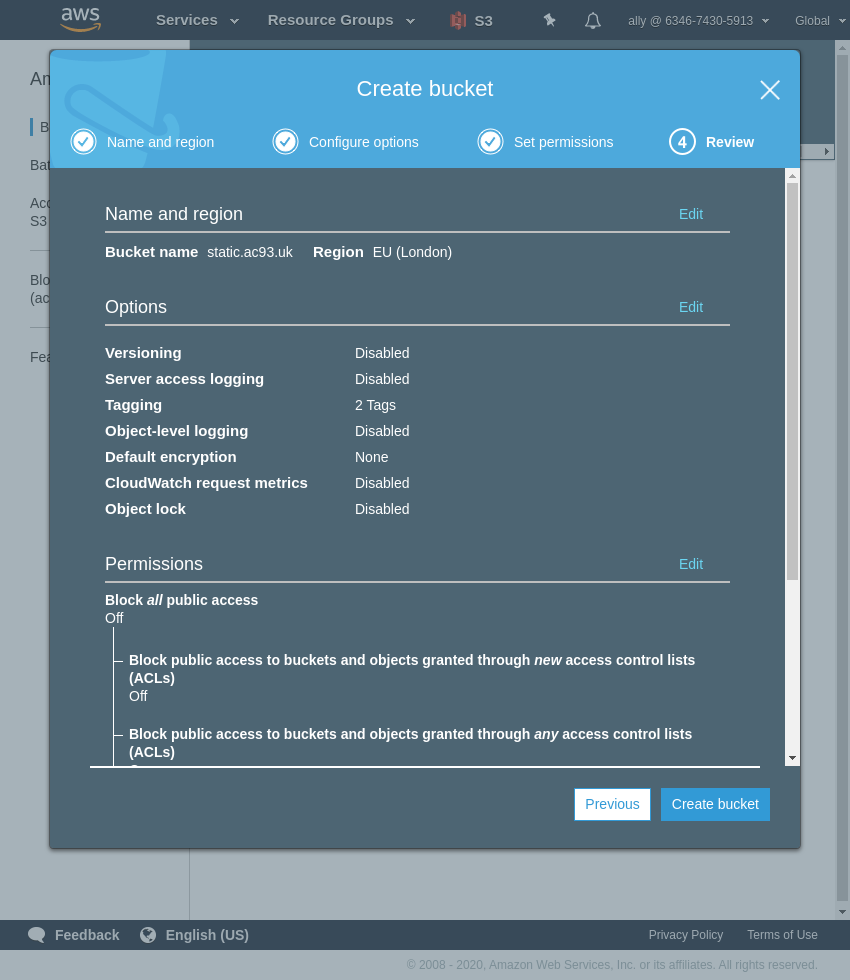
Double check everything is ok and Create Bucket.
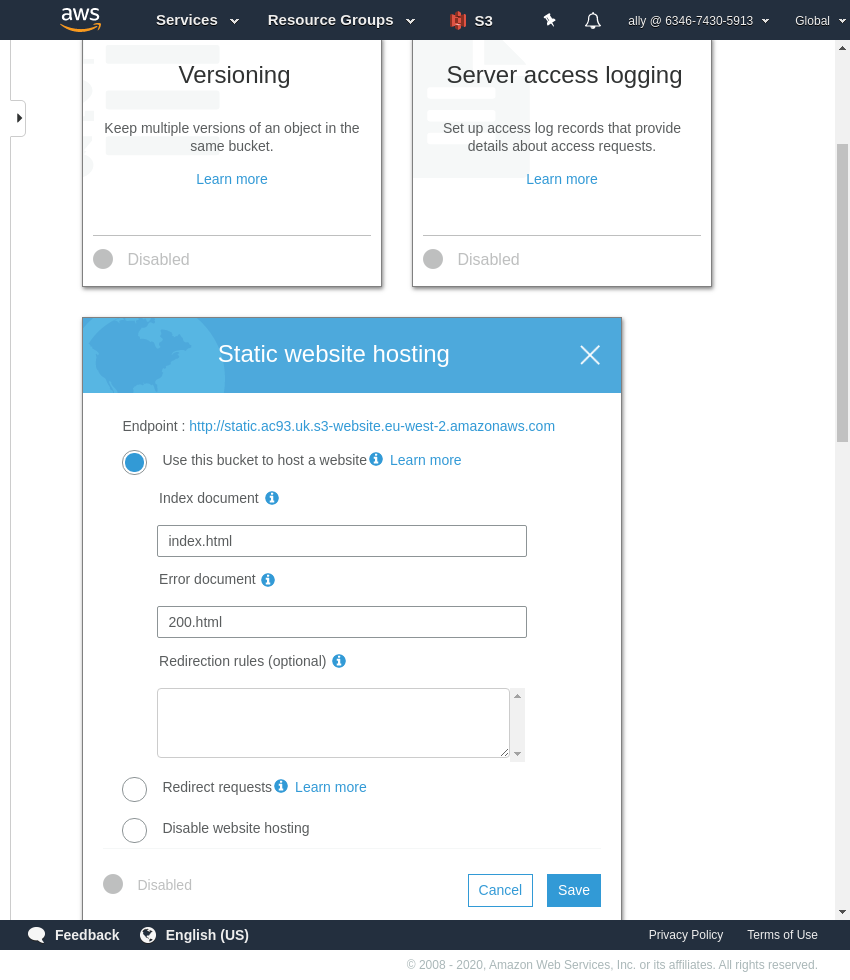
Go to the bucket, then the Properties tab, and find the Static website hosting panel. Select the Use this bucket to host a website option and set the index and error documents, and then save.
You can see in this panel the endppoint URL, which you can use directly or configure a CNAME later for a shorter URL.
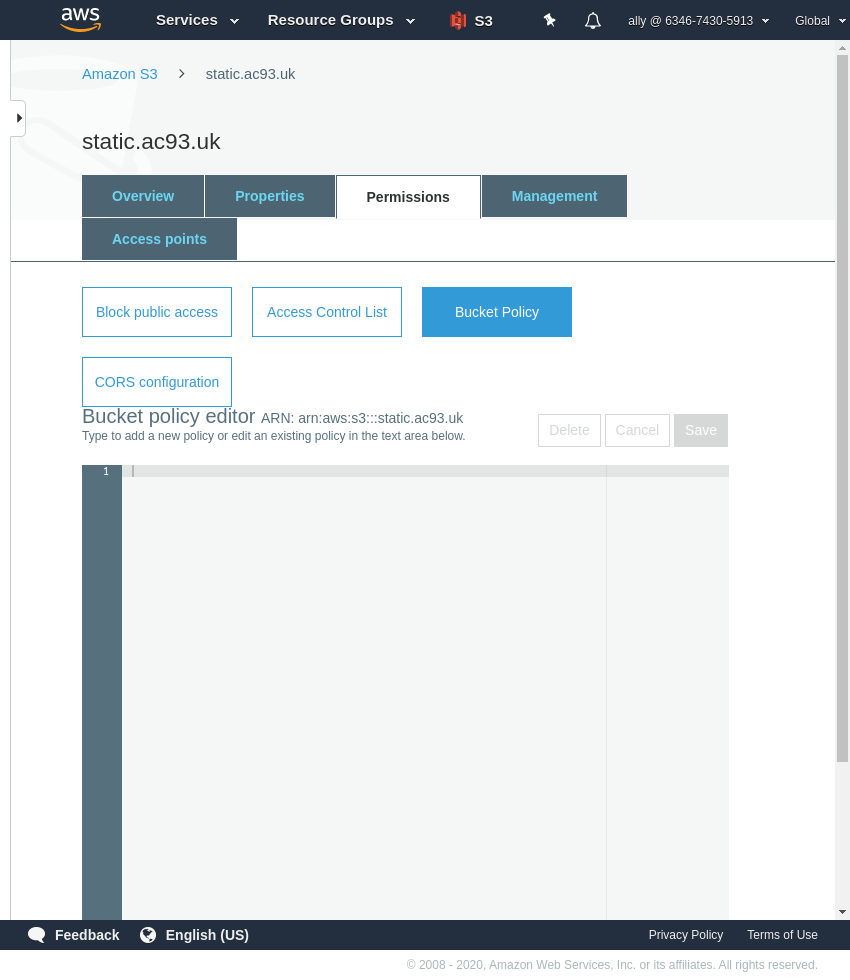
Nearly there. While still in the bucket, go to the Permissions tab, and then to Bucket Policy.
In this example we will add a policy which only allows access to certain list of IP addresses, which can be Cloudflare IPs or that of an office or for staff.
The policy will look like this:
|
|
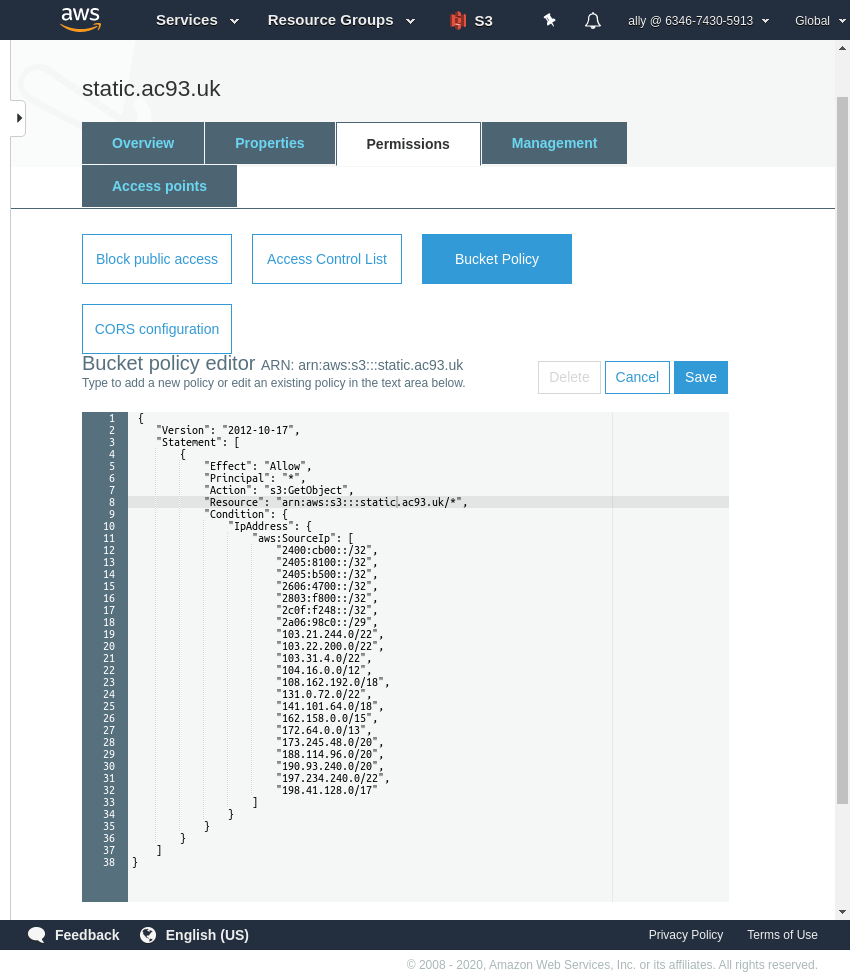
Paste the policy and Save.
Note: line 8, when creating the staging bucket, this will need tweaked to reflect the stage bucket ARN.
If we go to http://static.ac93.uk.s3-website.eu-west-2.amazonaws.com/
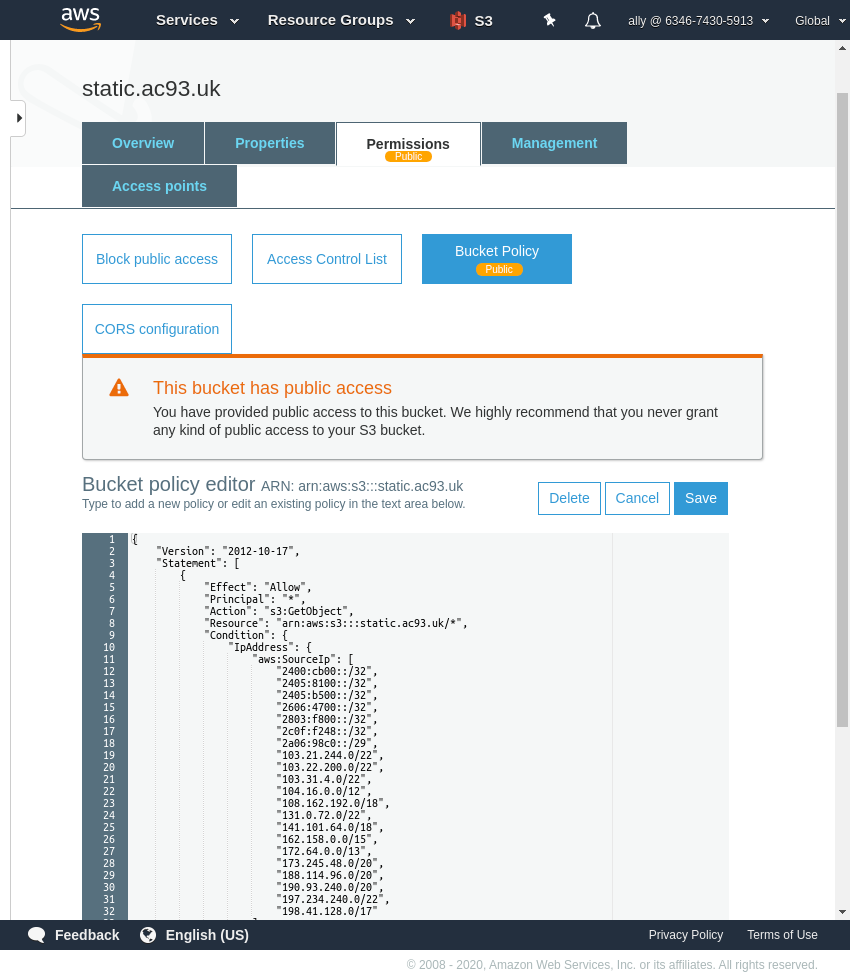
which you can find in the Properties tab under Static Website Hosting, we can see we do not have permission to access.
This is because we do not want direct access from anywhere.

This is virtually identical to the Production bucket, only changing the bucket name, user, role, bucket policy, etc. to reflect its stage environment.
IAM
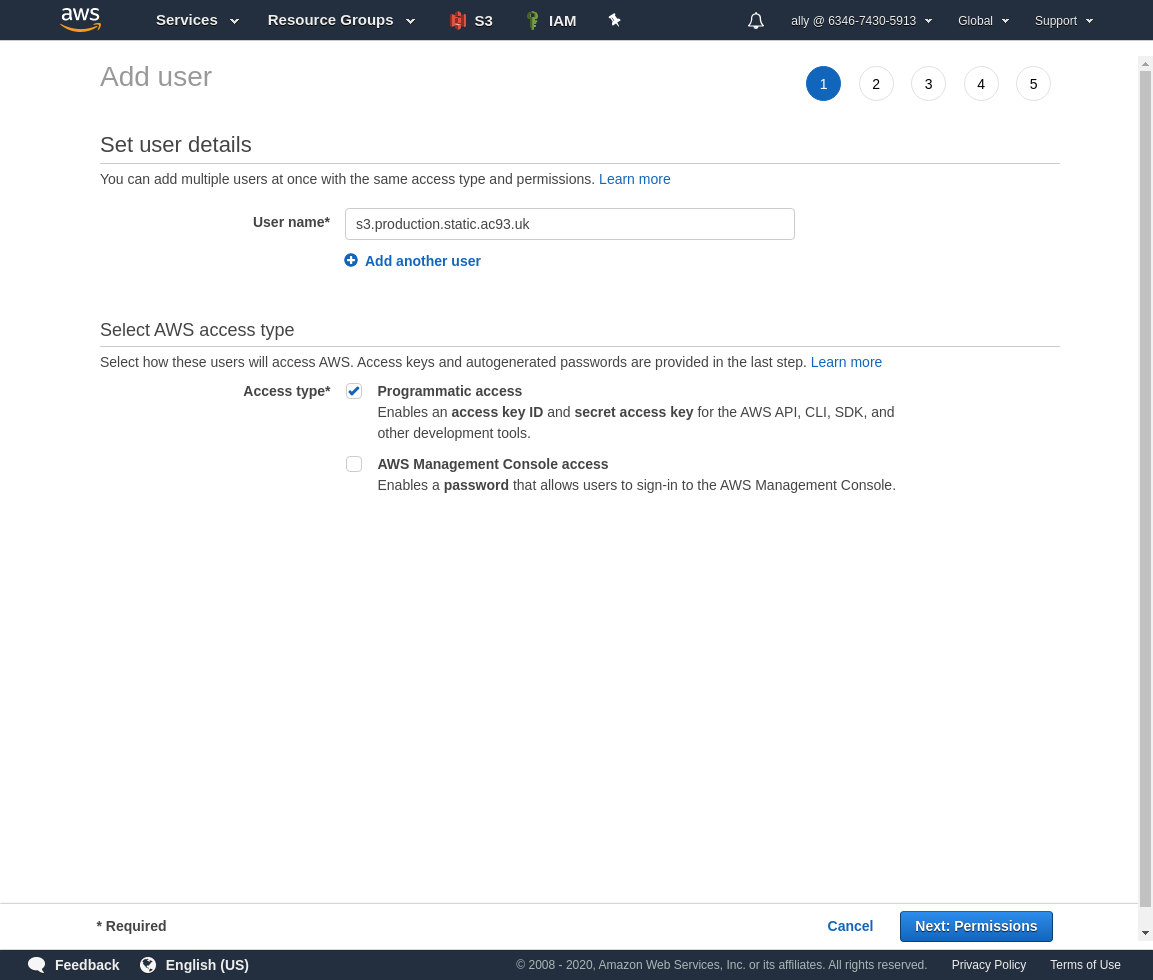
We will create two users, as you guessed they will be for production and stage.
I follow the pattern [service].[environment].[site] for creating users for API access.
So these users will be:
s3.production.static.ac93.uks3.stage.static.ac93.uk
Give the user a name, and allow Programmatic access only. Click next.
We will attach a policy to this user, but we need to create one first. Click Create policy, which opens in a new tab.
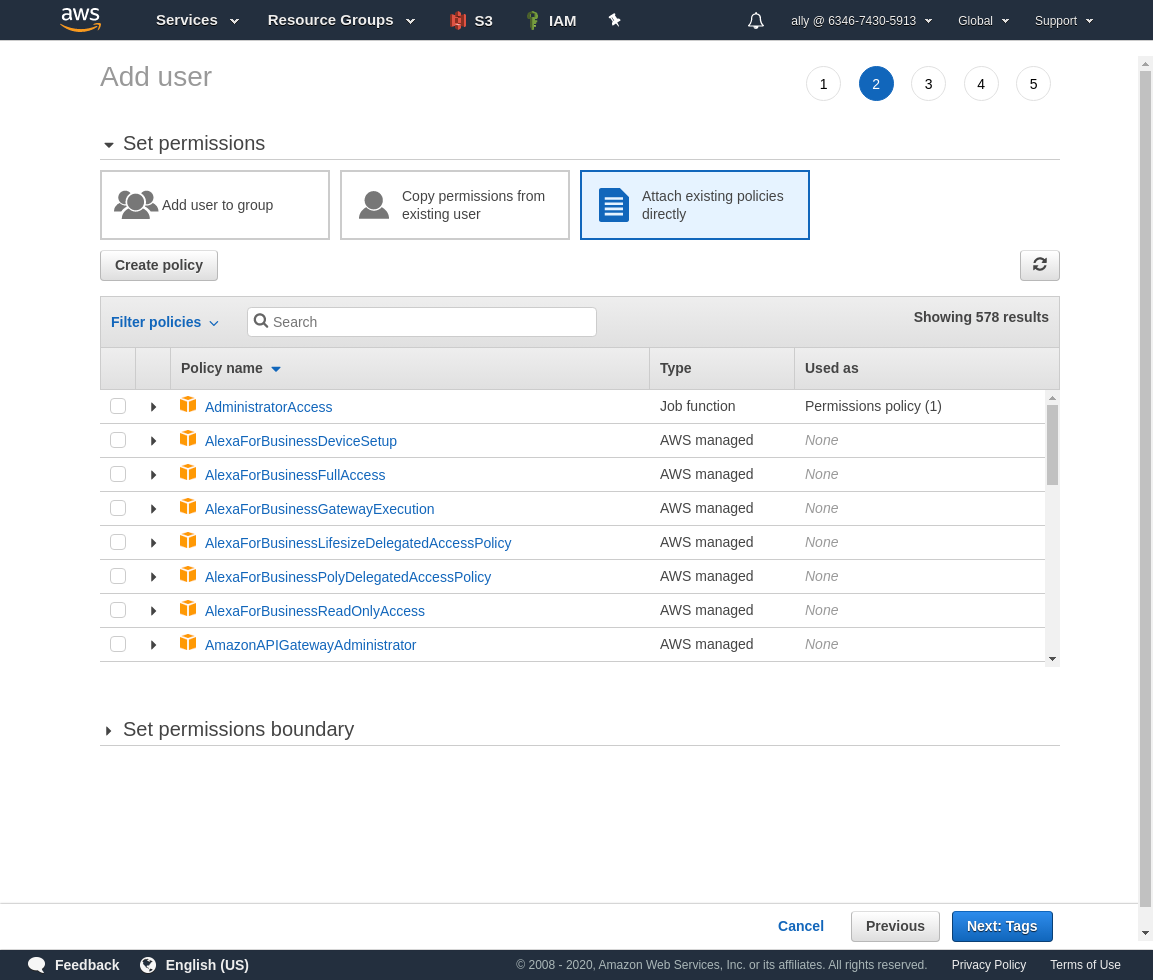
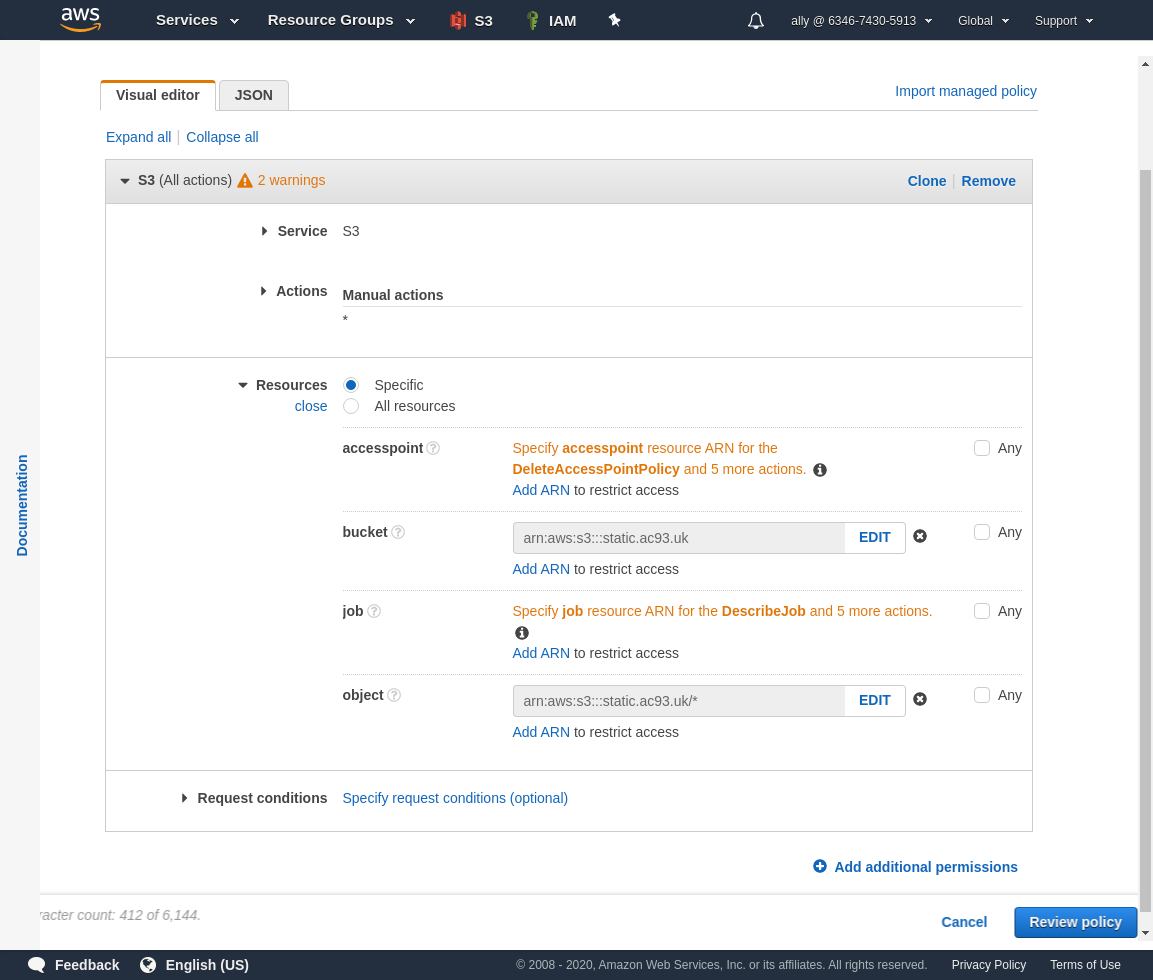
Select S3 from choose a service, and allow all actions.

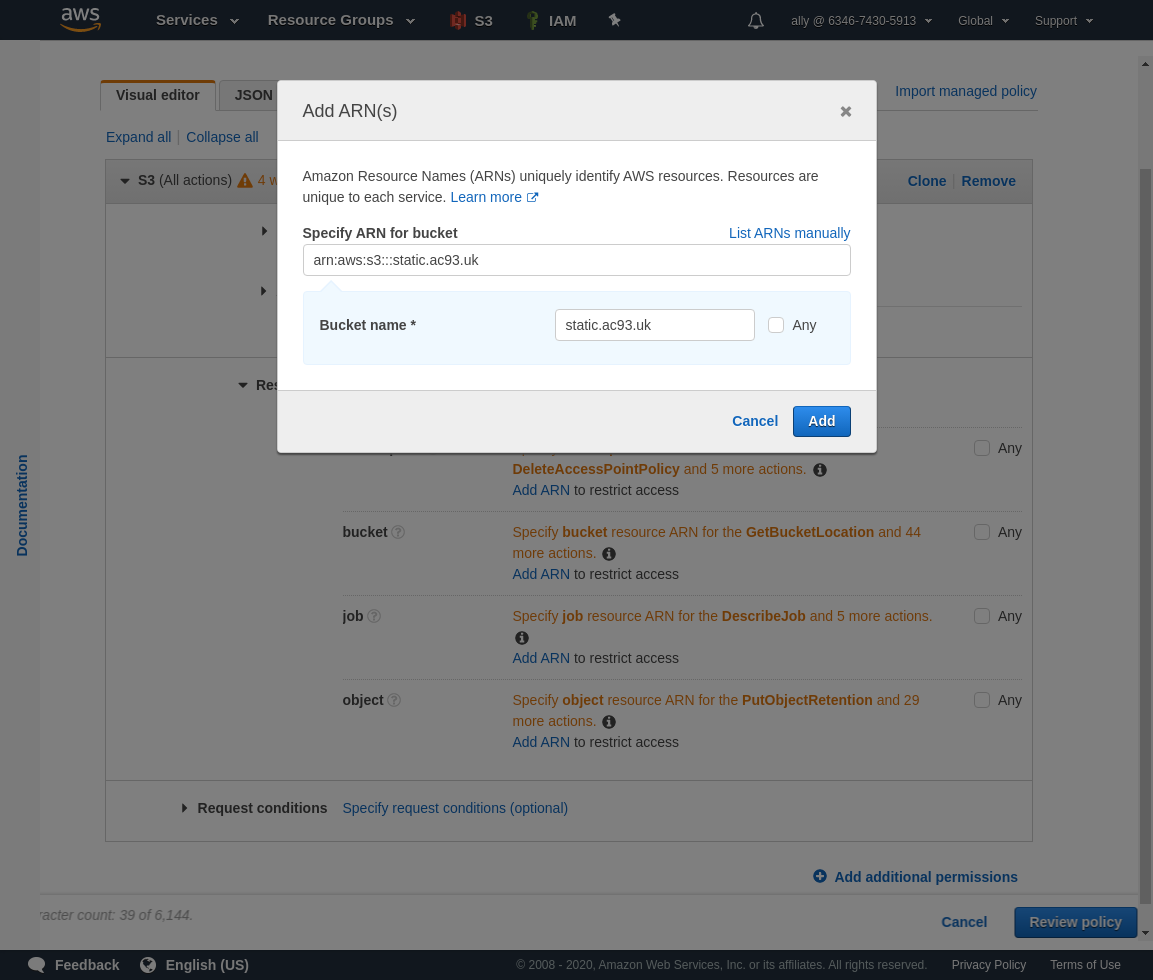
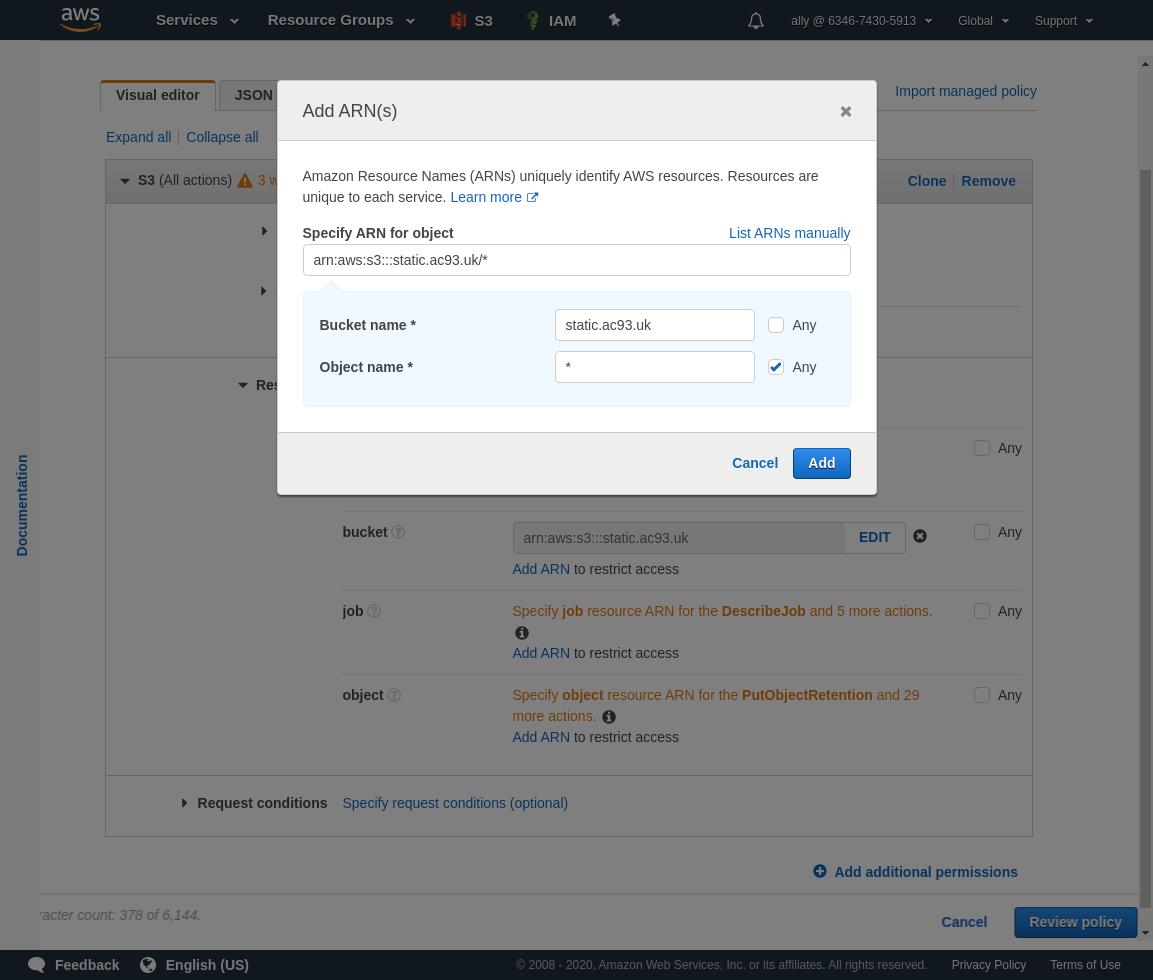
Open the Resources accordion. We will just configure the bucket and object,
Add an ARN to restrict access to only our bucket.
Add an ARN to restrict access to all objects in our bucket.
Click Review All when you are satisfied it has been configured correctly.
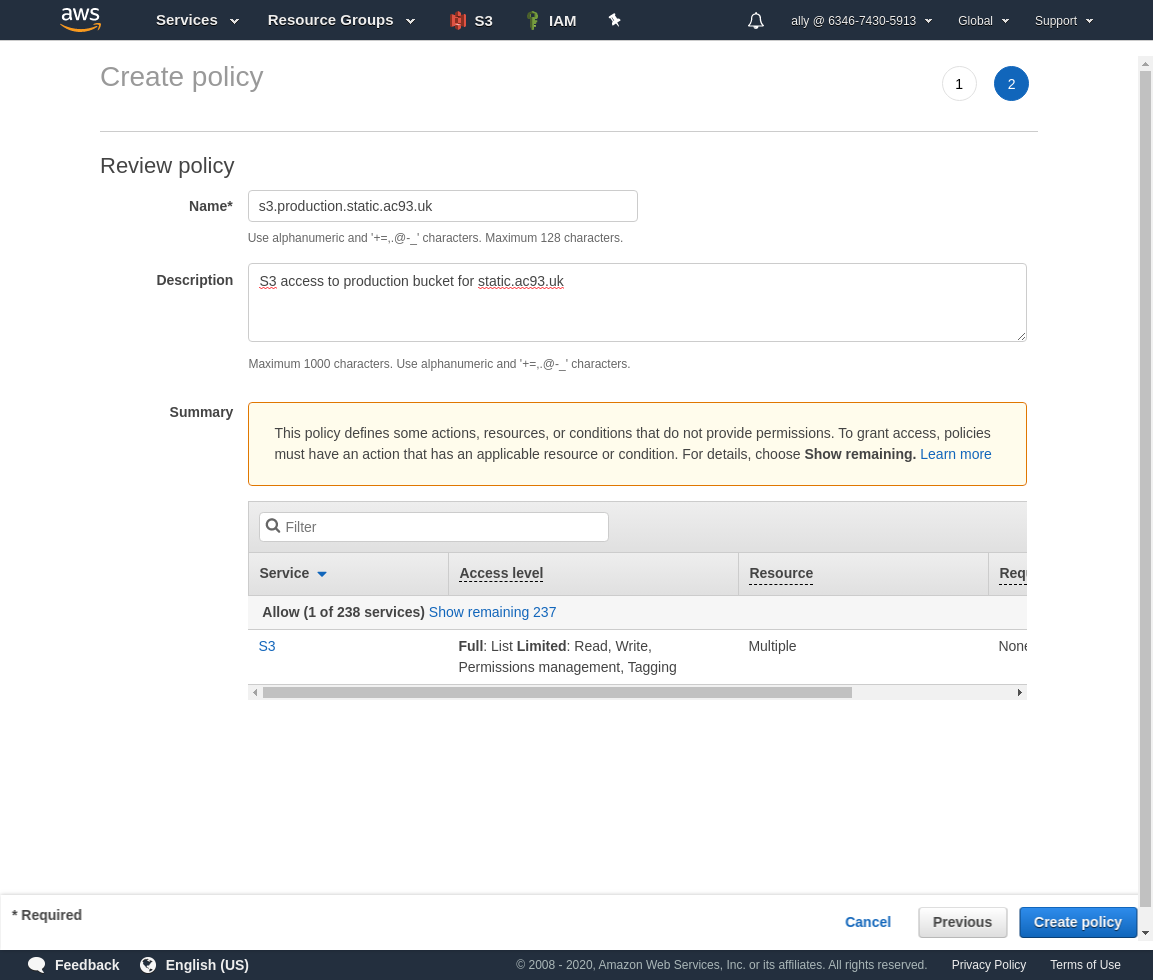
Give the policy a name.
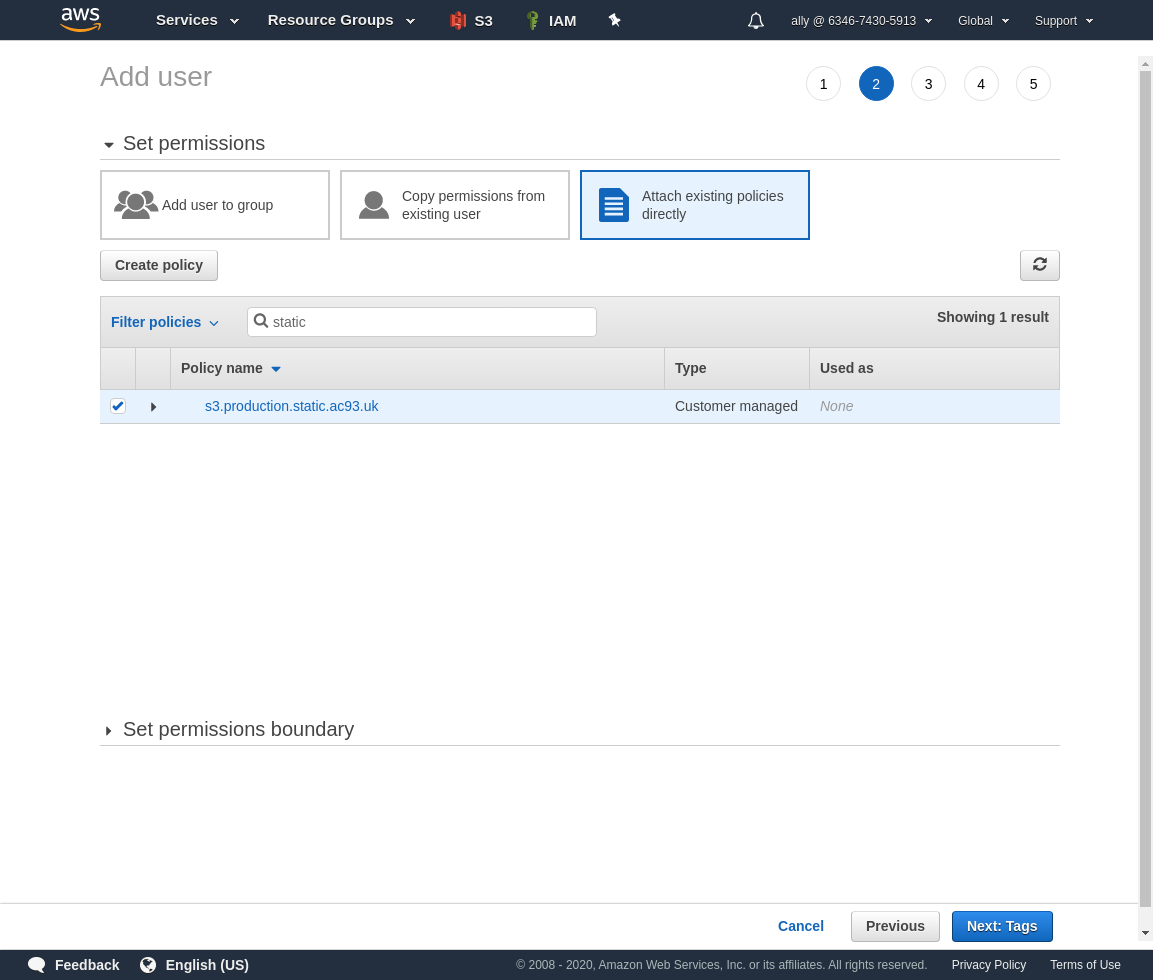
I tend to follow a similar pattern to the user name. Create policy and close the tab. Go back to the user creation tab, where we will add this policy (might require a refresh).
Search for the policy name, or filter on the customer created policies.
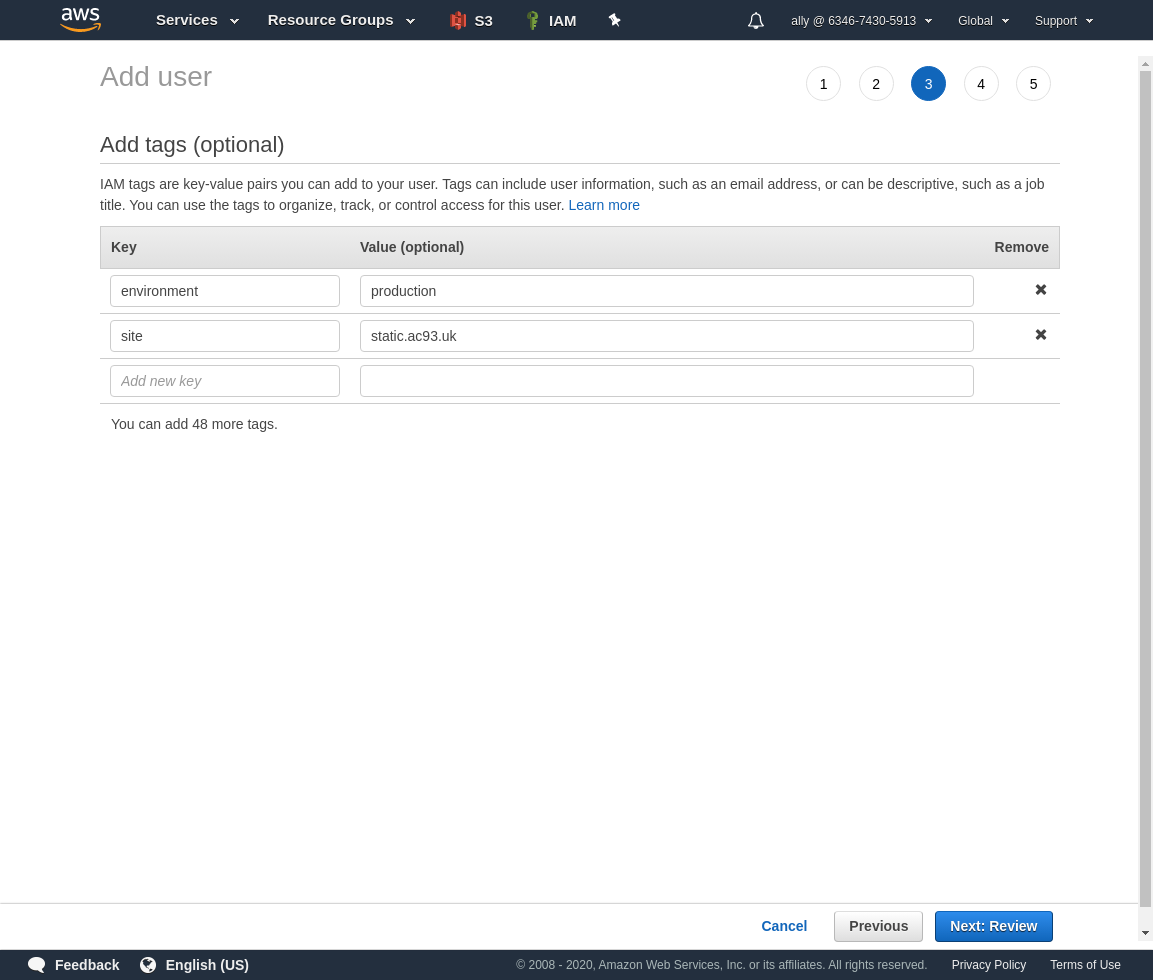
Add some tags if you like.
Review, and create if configured correctly.
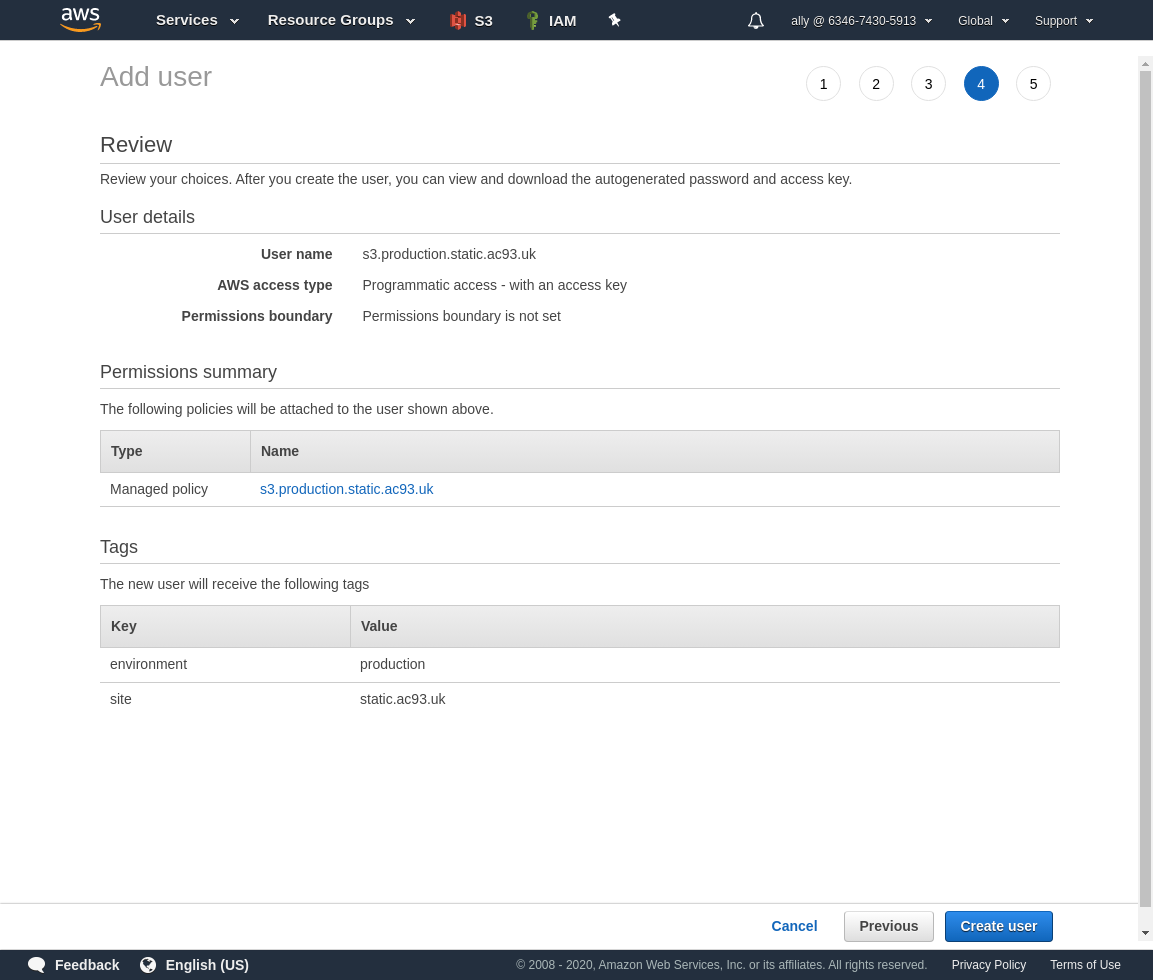
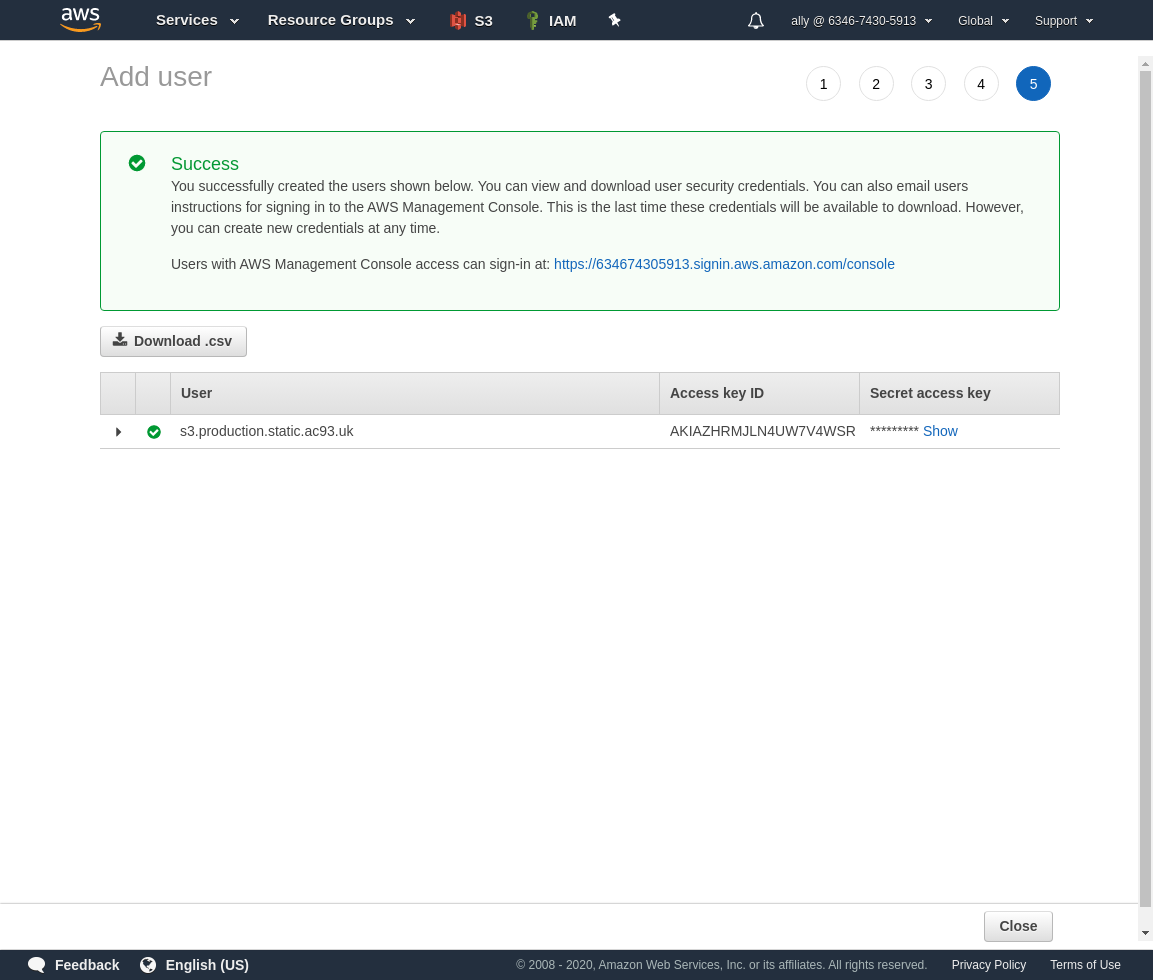
Now you have access keys save them safely now, you won’t be able to retrieve secret access key afterwards, so will have to re-do all this work.
Bitbucket
A couple things to cover in this section:
- Configuring repository settings (i.e. AWS region, default build folder (as configured by
nuxt.config.js)) - Configuring deployment secrets (i.e. AWS access key, AWS secret access key, etc.)
- Configuring branches (i.e. origin and destination for features/PRs)
- Adding
bitbucket-pipelines.yml
Setting Repository & Pipeline Configuration
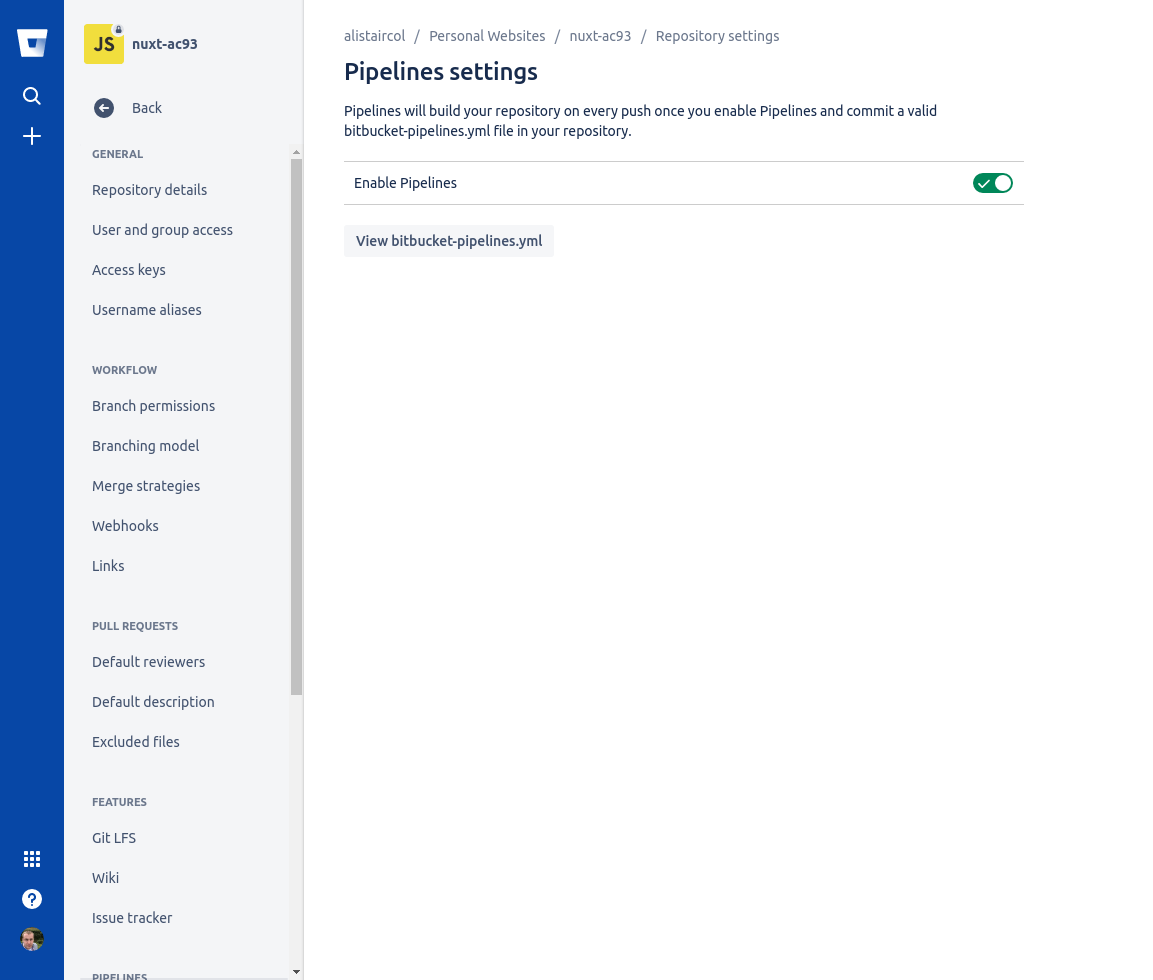
When you create a new repo for the project, go to Repository Settings -> Pipelines -> Settings and enable pipelines.
You can find plenty of integrations in the Repository Settings -> Pipelines -> Integrations
We need a way to handle our configuration/secrets, so go to Repository Settings -> Repository variables
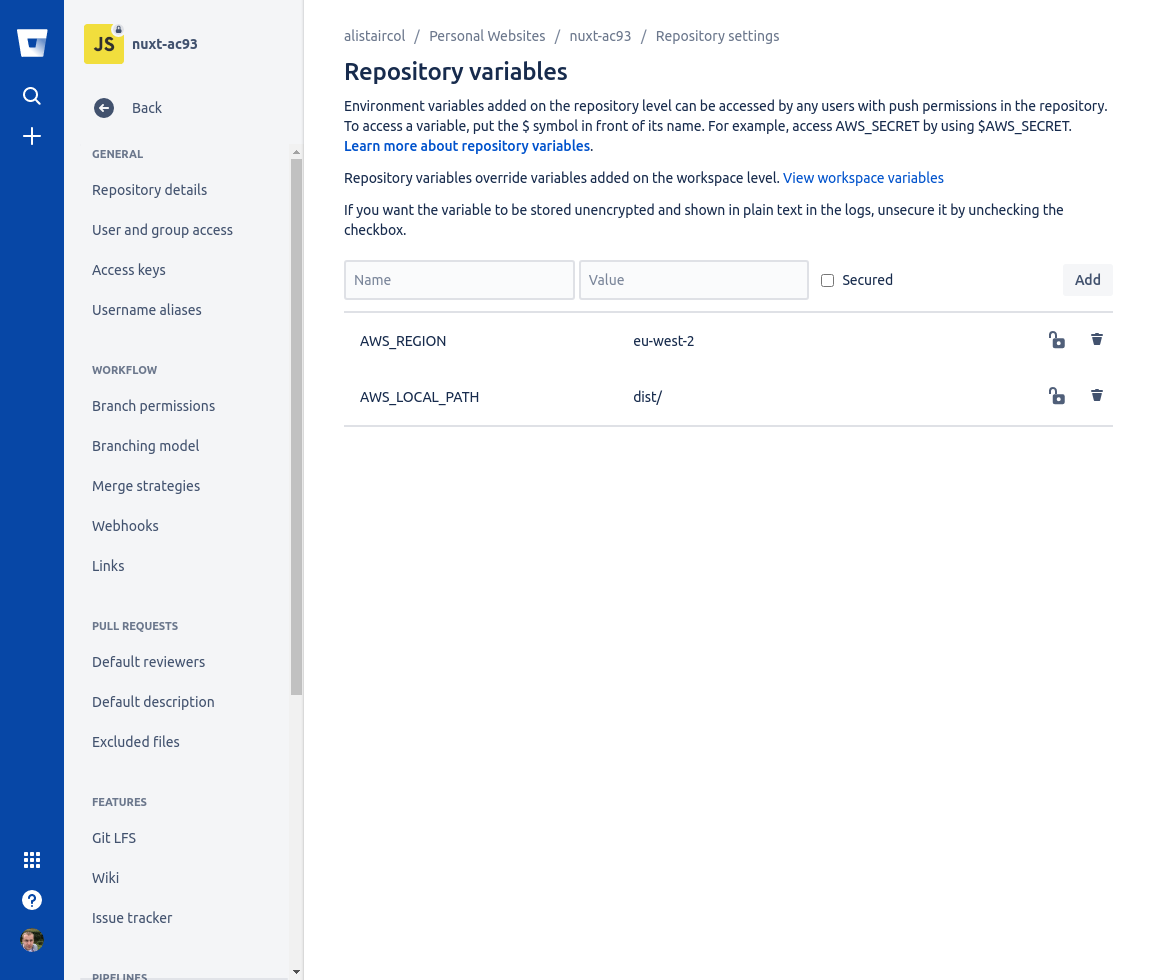
Since we will have two environments (production and stage/staging) we need to configure (access keys, bucket name, etc.) them differently.
Go to Repository Settings -> Pipelines -> Deployments
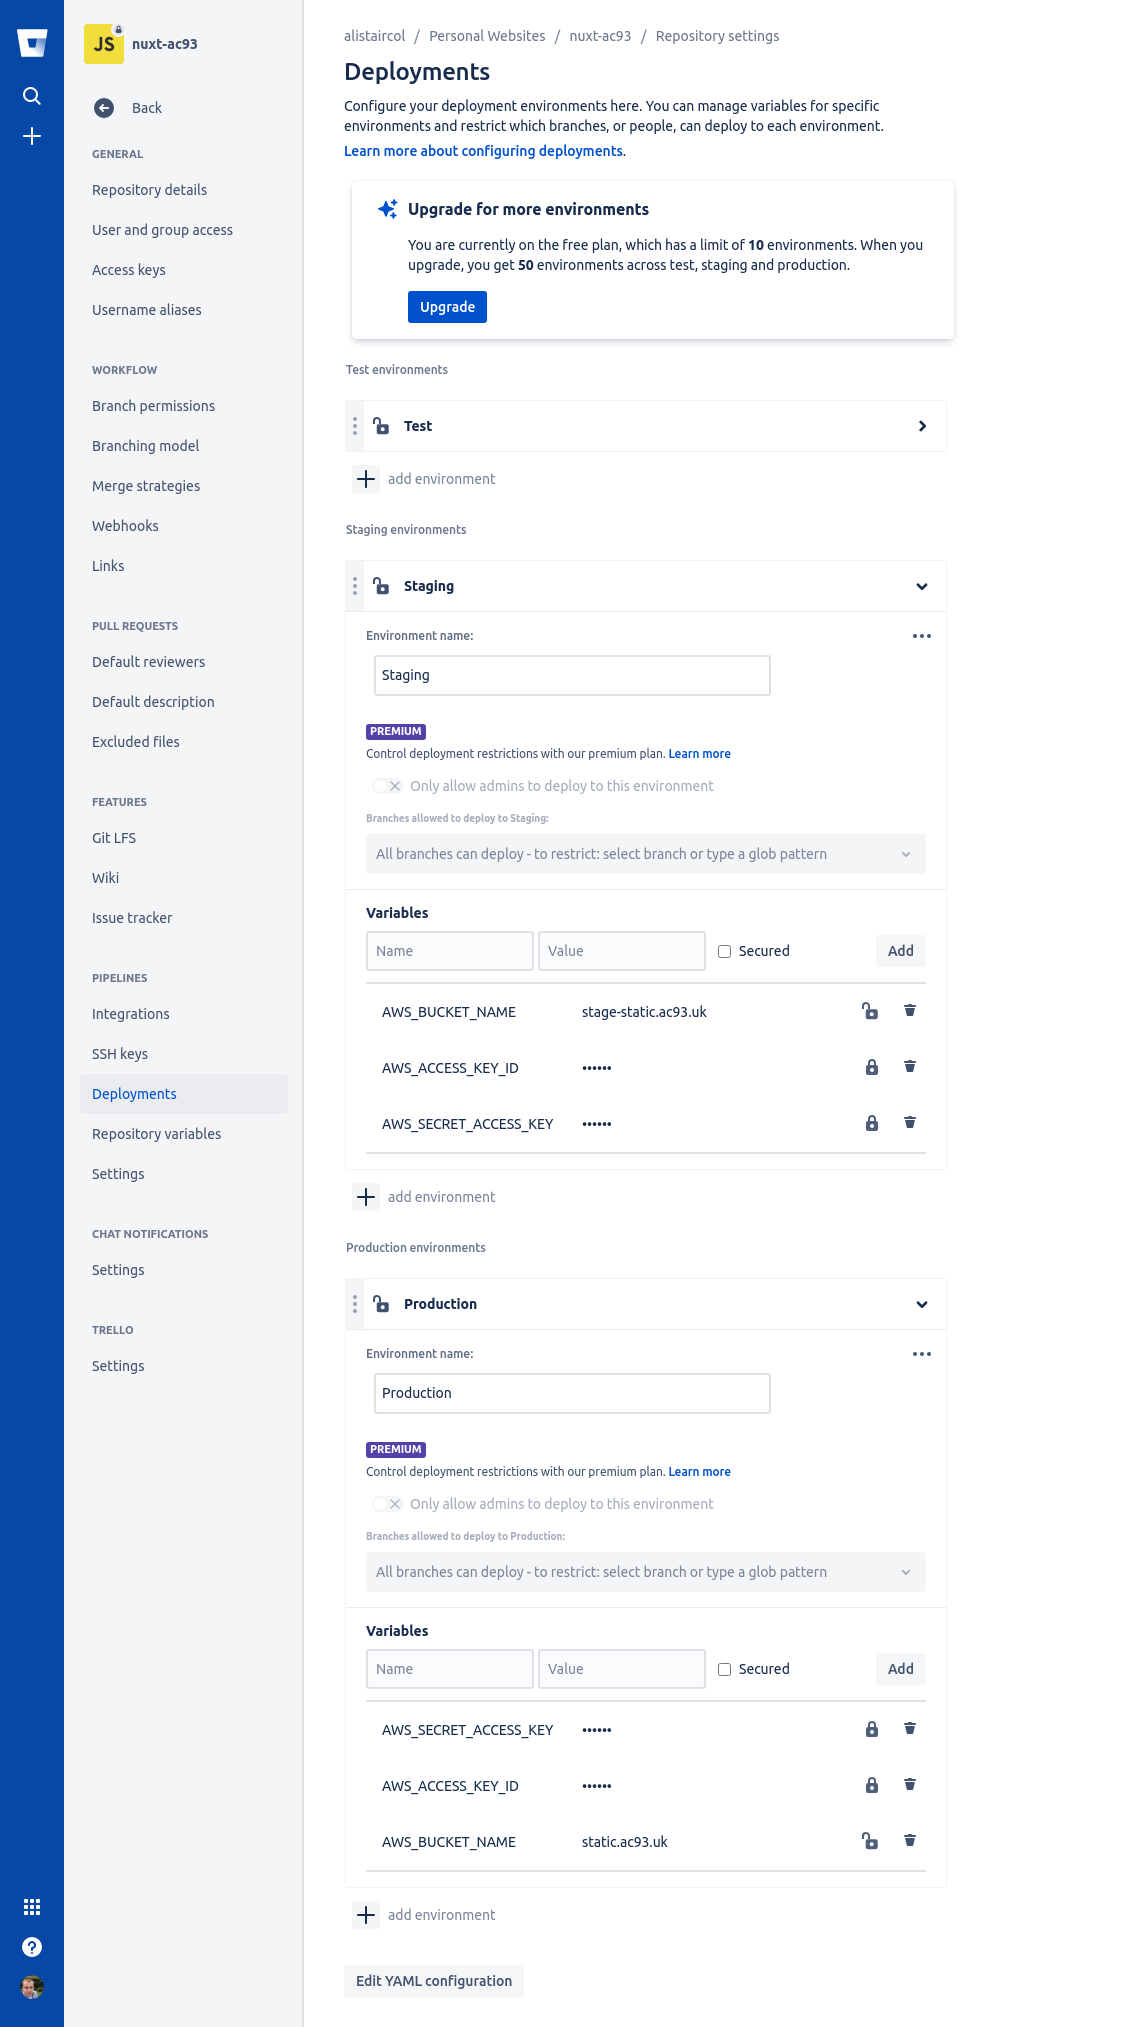
The deployment variables take precedence over repository variables. We will see these in the bitbucket-plugins.yml a little later.
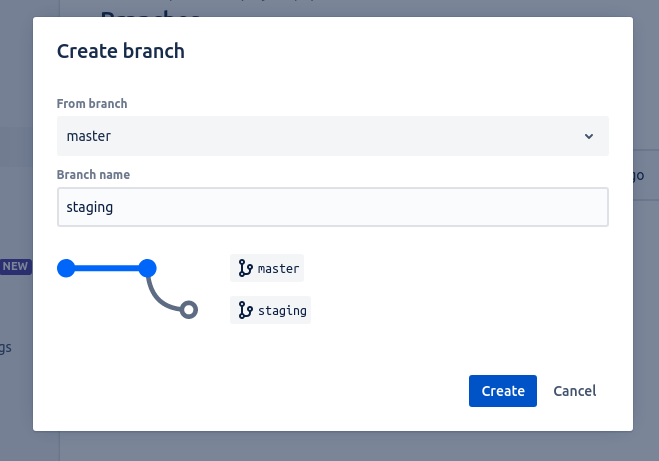
Configuring Branches
Go to branches and create a new one, call it staging which branches from master.
Go to Repository Settings -> Workflow -> Branching Model
- Development branch: use specific branch and select
staging - Production branch: ues main branch (this is set in
Repository Settings -> General -> Repository Details -> Advanced)
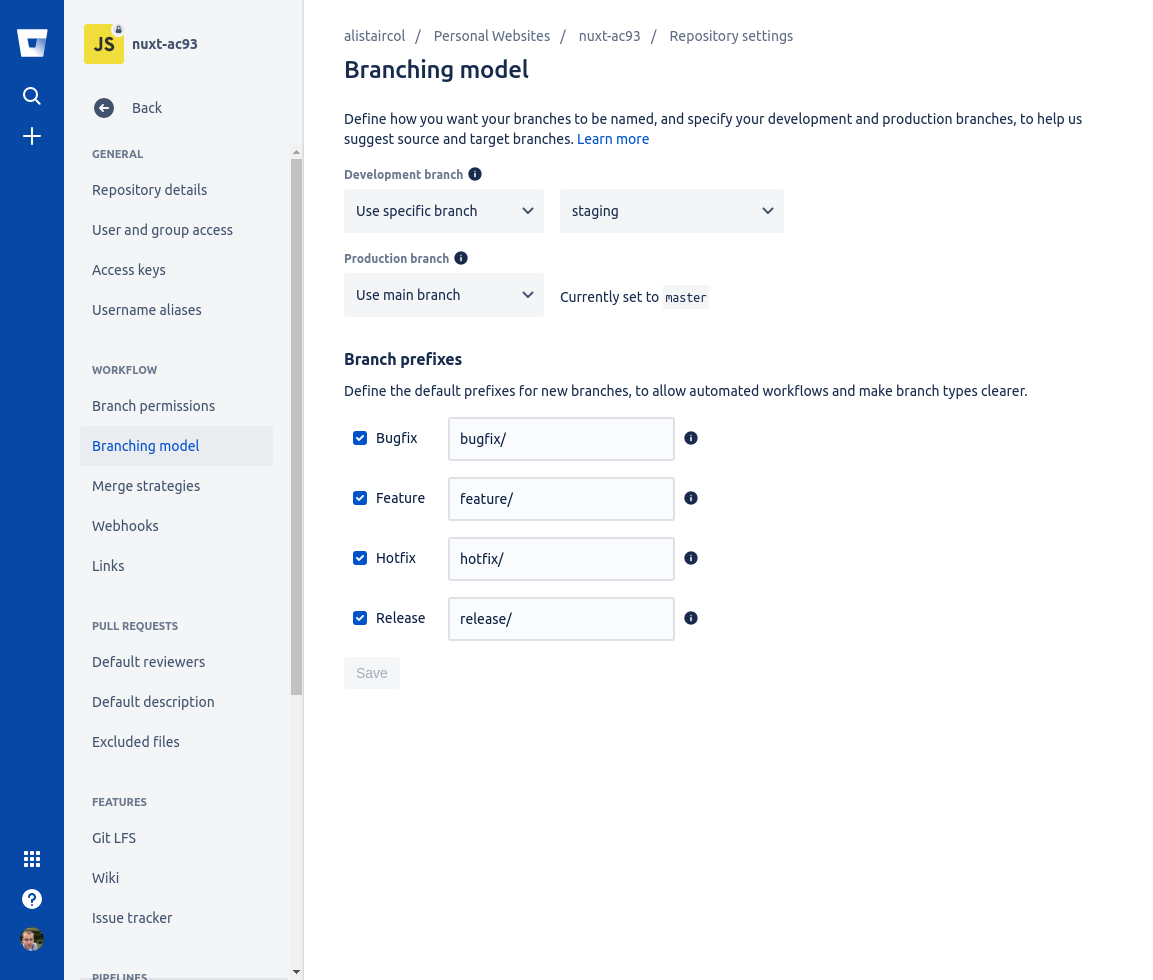
This means new branches will be based on master but are merged into staging when approved and therefore onto staging environment to look at before release to production.
Adding the Repository Pipelines
Summary:
- Push to
masterwill trigger the build and push toproductionbucket (usingproductiondeployment) - Push to
stagingwill trigger the build and push tostagebucket (usingstagingdeployment) - Push to other branches will not trigger
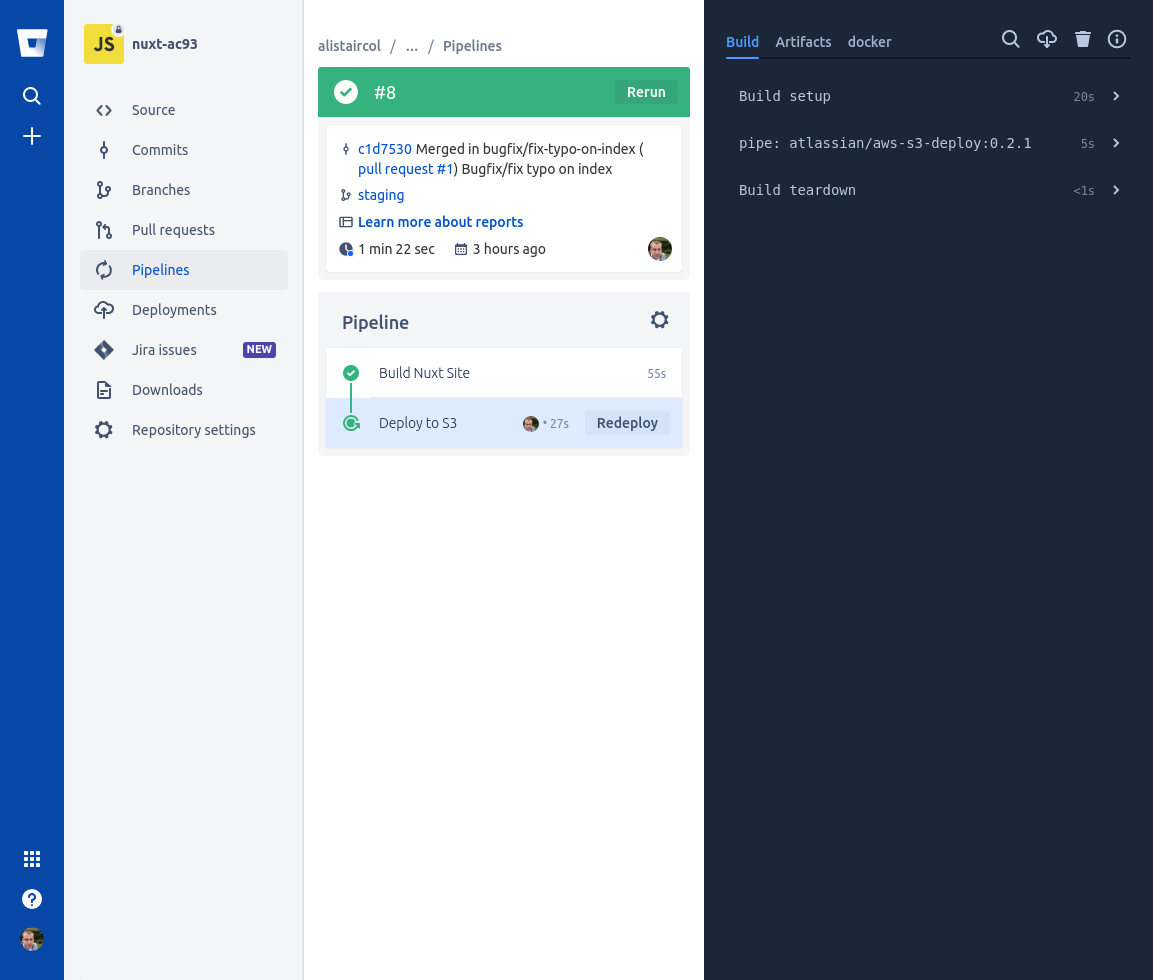
The pipeline here is very simple, just a couple of steps to build the site and copy to S3. The default deployment (environment) is staging.
We use &, * and <<* which are yml anchors which helps cut down on the duplication.
The second step on master branch is copying *push-site step but overriding the deployment (environment) to be production (deployment).
Variables are key: value, the value prefixed with $ will try to be read from deployment and repository variables.
bitbucket-pipelines.yml:
# https://gist.github.com/bgreater/07ee09f6f95ac8d51de0afc89779ff80
image: node:10.15.3

definitions:
  steps:
    - step: &build-site
        name: Build Nuxt Site
        caches:
          - node
        script:
          - npm set audit false
          - npm ci
          - npm run generate
        artifacts:
          - dist/**
    - step: &push-site
        name: Deploy to S3
        deployment: staging
        script:
          - pipe: atlassian/aws-s3-deploy:0.2.1
            variables:
              AWS_ACCESS_KEY_ID: $AWS_ACCESS_KEY_ID
              AWS_SECRET_ACCESS_KEY: $AWS_SECRET_ACCESS_KEY
              AWS_DEFAULT_REGION: $AWS_REGION
              S3_BUCKET: $AWS_BUCKET_NAME
              LOCAL_PATH: $AWS_LOCAL_PATH
              ACL: "public-read"
              CACHE_CONTROL: "max-age=30672000"
              DELETE_FLAG: "true"

# maybe will need to add additional variables into build-site
# if we want to maybe use different keys/vars for Email or whatever
# deployment: production
# deployment: staging
# will read the production/staging pipeline environments over the repository ones
pipelines:
  branches:
    master:
      - step: *build-site
      - step:
          <<: *push-site
          deployment: production
    staging:
      - step: *build-site
      - step: *push-site
Commit this file to your repository and good luck, it should go through the steps you have configured for each branch!
Nuxt
Our static site will be configured something like this (fictional URLs):
nuxt.config.js:
export default {
    // Target (https://go.nuxtjs.dev/config-target)
    target: 'static',

    // ...

    publicRuntimeConfig: {
        contactApiUrl: (() => {
            // local build
            if (!process.env.hasOwnProperty('BITBUCKET_BRANCH')) {
                return 'http://local-api.ac93.uk/contact/general';
            }
            // CI build
            return process.env.BITBUCKET_BRANCH === 'master'
                ? 'https://api.ac93.uk/contact/general'
                : 'https://stage.api.ac93.uk/contact/general'
        })(),
    }
}
For accessing these config values in a component/page:
pages/contact.vue:
|
|
Cloudflare
It’s just a case of adding a CNAME with the URL from the Static website hosting section in the bucket properties.

While there are other options out there (and I use them) for this specific scenario like netlify, this could be easily adapted, and CI/CD doesn’t need to be as complicated as I first thought.
A good example of adapting this could be to use Doxygen or similar to build documentation for your application and push to a bucket with restricted access to only developer IPs, etc.