Introduction
A good place to start to get a brief overview, watch RabbitMQ in 5 Minutes.
In this article’s scenario we will take a file from a customer containing jobs, which could contain 2,000+ rows which need to be validated and then imported to a system in some way.
If you have a crappy queue then this will block other jobs because this validation could take a few minutes to complete, and if the crappy queue a hard timeout limit then the job might get cut off prematurely and then be retried when the crappy queue restarts again, which could block the queue for even longer.
This is the problem we will try to solve. We will publish a message to our message broker. Have a consumer validate the file (message will contain the uuid of the file). This means this task will not use our apps crappy built-in queue, which typically handles much smaller tasks.
Repo: https://github.com/alistaircol/php-rabbitmq-demo
For local development and demonstration we will use Docker.
docker-compose.yml:
version: '3'
services:
  rabbitmq:
    image: rabbitmq:3-management
    container_name: ac_rabbitmq
    ports:
      # expose admin panel port
      - "15672:15672"
Configure RabbitMQ
Go to http://localhost:15672/ and login with guest:guest where we will add exchanges, queues, route bindings, etc.

Add a new exchange
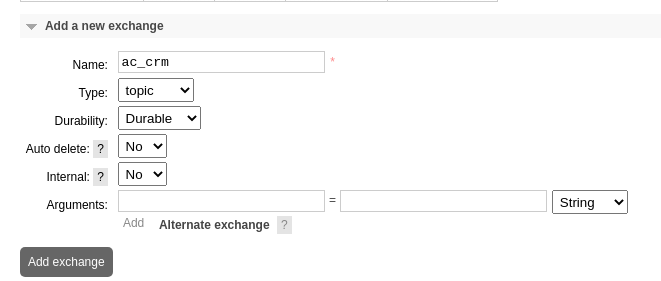
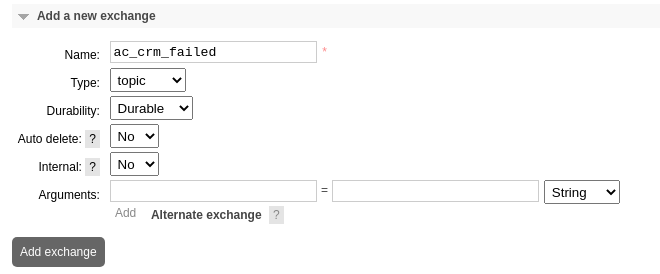
We will add two exchanges:
- One for
crm(the app which will publish messages) - One for
crmfor where the worker encounters an error doing work on this message (dead-letter exchange)- Won’t go into much detail in this article about this, but, if this was sending an email maybe you’d process again later if the API was temporarily down or something like that.
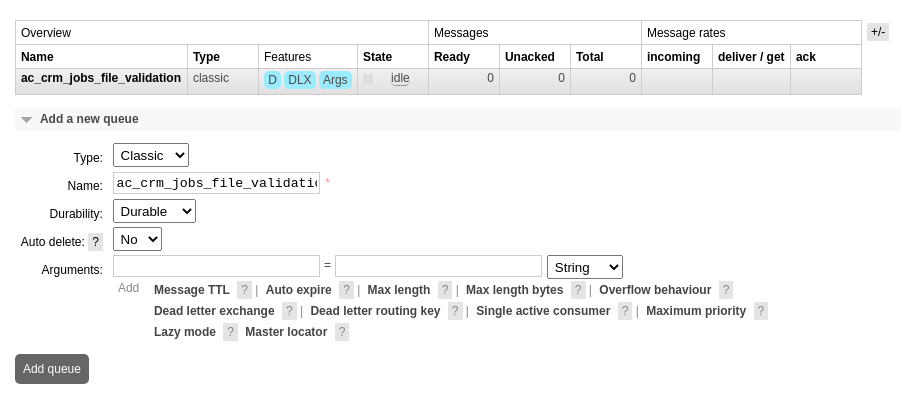
Add a new queue
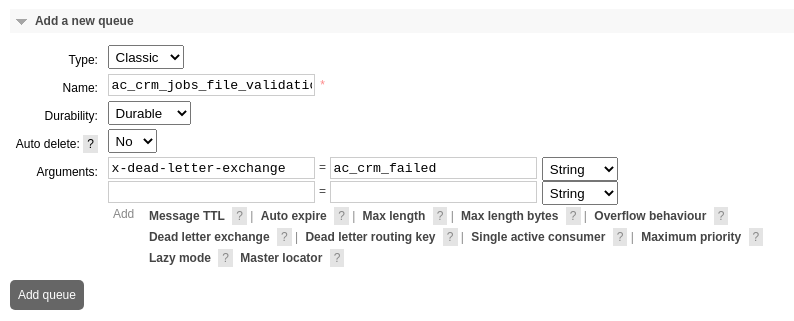
Similar to the exchanges, we are going to set up two queues:
- One for
crmworker to validate the uploaded jobs files, this will have dead letter exchange so that if the workerrejectit will go to second queue to be tried at another time.
- One for
crmworker to do something for job files which failed validation.
Add a binding (to a queue)
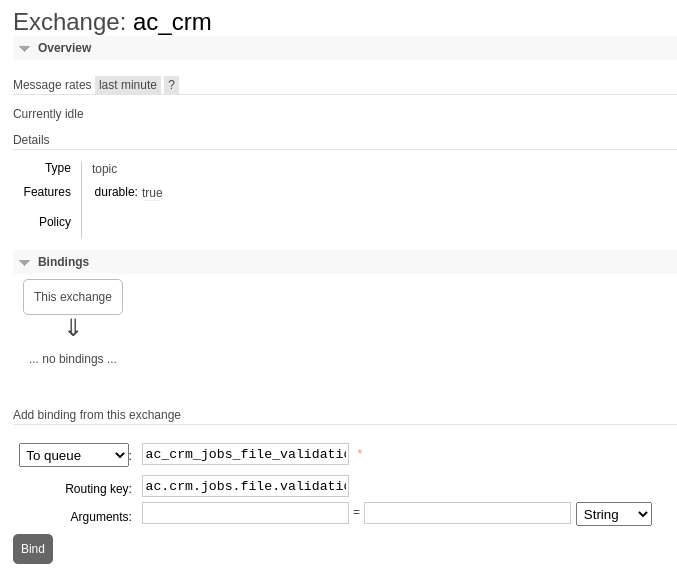
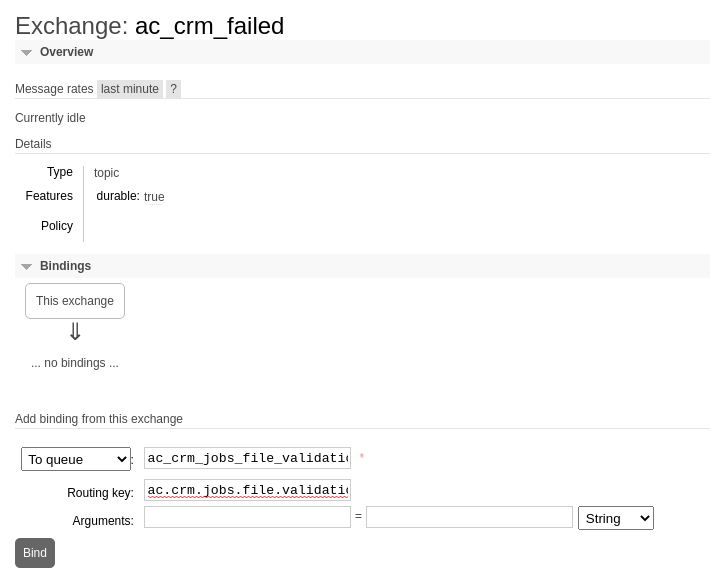
Alternatively, you could do this via the API: http://localhost:15672/api/index.html.
Saving/Syncing Configuration
Imagine this configuration is for your production instance, and you want to get the same environment locally, or for a staging environment - we can do that!
docker exec -t ac_rabbitmq bash -c \
    'rabbitmqctl export_definitions - --format=json' \
    > definitions.json
Or a more ghetto way I hacked when first learning:
curl --user guest:guest \
    http://localhost:15672/api/definitions \
    | jq . > definitions.json
The configuration described above, will give the following json:
definitions.json:
{
  "rabbit_version": "3.8.7",
  "rabbitmq_version": "3.8.7",
  "product_name": "RabbitMQ",
  "product_version": "3.8.7",
  "users": [
    {
      "name": "guest",
      "password_hash": "B1uzREbvI+EYznFhIGD1q1hVxFrWI/Mlts8LKySrusvrkvUR",
      "hashing_algorithm": "rabbit_password_hashing_sha256",
      "tags": "administrator"
    }
  ],
  "vhosts": [
    {
      "name": "/"
    }
  ],
  "permissions": [
    {
      "user": "guest",
      "vhost": "/",
      "configure": ".*",
      "write": ".*",
      "read": ".*"
    }
  ],
  "topic_permissions": [],
  "parameters": [],
  "global_parameters": [
    {
      "name": "cluster_name",
      "value": "rabbit@e7798ec097cd"
    },
    {
      "name": "internal_cluster_id",
      "value": "rabbitmq-cluster-id-EudAVTs3nqt9d0ZWXgGA4A"
    }
  ],
  "policies": [],
  "queues": [
    {
      "name": "ac_crm_jobs_file_validation",
      "vhost": "/",
      "durable": true,
      "auto_delete": false,
      "arguments": {
        "x-dead-letter-exchange": "ac_crm_failed",
        "x-queue-type": "classic"
      }
    },
    {
      "name": "ac_crm_jobs_file_validation_failed",
      "vhost": "/",
      "durable": true,
      "auto_delete": false,
      "arguments": {
        "x-queue-type": "classic"
      }
    }
  ],
  "exchanges": [
    {
      "name": "ac_crm",
      "vhost": "/",
      "type": "topic",
      "durable": true,
      "auto_delete": false,
      "internal": false,
      "arguments": {}
    },
    {
      "name": "ac_crm_failed",
      "vhost": "/",
      "type": "topic",
      "durable": true,
      "auto_delete": false,
      "internal": false,
      "arguments": {}
    }
  ],
  "bindings": [
    {
      "source": "ac_crm",
      "vhost": "/",
      "destination": "ac_crm_jobs_file_validation",
      "destination_type": "queue",
      "routing_key": "ac.crm.jobs.file.validation",
      "arguments": {}
    },
    {
      "source": "ac_crm_failed",
      "vhost": "/",
      "destination": "ac_crm_jobs_file_validation_failed",
      "destination_type": "queue",
      "routing_key": "ac.crm.jobs.file.validation",
      "arguments": {}
    }
  ]
}
We might want to have these definitions in version control, so we will need to tell our instance to load definitions from this file.
rabbitmqctl import_definitions will read json from stdin, so, for definitions.json, something like this:
cat definitions.json | \
    docker exec -i \
    ac_rabbitmq \
    bash -c 'rabbitmqctl import_definitions'
Or another ghetto way:
We will place a new file in /etc/rabbitmq/conf.d, all *.conf files are loaded.
/etc/rabbitmq/conf.d/load_definitions.conf:
management.load_definitions = /etc/rabbitmq/definitions.json
Use these new files as volumes for our local development setup.
docker-compose.yml:
 version: '3'
 services:
   rabbitmq:
     image: rabbitmq:3-management
     container_name: ac_rabbitmq
     ports:
       # expose admin panel port
       - "15672:15672"
+    volumes:
+      - "load_definitions.conf:/etc/rabbitmq/conf.d"
+      - "definitions.json:/etc/rabbitmq/definitions.json"
That’s enough of RabbitMQ instance for now.
Publisher/Producer & Subscriber/Consumer Apps
Will add a ac_worker container for producer/publisher and consumer/subscriber code.
docker.compose.yml:
 version: '3'
 services:
   rabbitmq:
     image: rabbitmq:3-management
     container_name: ac_rabbitmq
     ports:
       # expose admin panel port
       - "15672:15672"
     volumes:
       - "load_definitions.conf:/etc/rabbitmq/conf.d"
       - "definitions.json:/etc/rabbitmq/definitions.json"
+
+  worker:
+    build:
+      context: .
+    image: php_worker
+    container_name: ac_worker
Dockerfile for the consumer(s) and producer(s):
FROM php:7.4-apache
RUN sudo apt-get update \
    && sudo apt-get install -y \
        zip \
        git \
    && docker-php-ext-install sockets

COPY --from=composer:latest /usr/bin/composer /usr/bin/composer
apache just because it’s always running, and just installing sockets extension to communicate with RabbitMQ.
MessageBroker
Will have a MessageBroker class which publisher and consumer will use to communicate to the RabbitMQ instance.
src/MessageBroker.php:
<?php

namespace App;

use Enqueue\AmqpLib\AmqpConnectionFactory;
use Interop\Amqp\AmqpContext;

class MessageBroker
{
    private AmqpConnectionFactory $connection;

    /**
     * MessageBroker constructor.
     *
     * @see https://php-enqueue.github.io/transport/amqp_lib/#create-context
     */
    private function __construct()
    {
        $this->connection = new AmqpConnectionFactory([
            'host' => 'ac_rabbitmq', // docker container_name
            'port' => 5672,
            'user' => 'guest',
            'pass' => 'guest',
            'vhost' => '/',
            'persisted' => true,
        ]);
    }

    /**
     * @return AmqpContext
     */
    public static function context(): AmqpContext
    {
        $me = new self();
        return $me->connection->createContext();
    }
}
Publisher
Will use a symfony/console command for publishing an example message. This is an interactive demo for illustration purposes only.

src/Command/JobsFileValidationProducerCommand.php:
<?php

namespace App\Command;

use Interop\Amqp\AmqpContext;
use Interop\Amqp\AmqpTopic;
use Interop\Queue\Exception;
use Symfony\Component\Console\Command\Command;
use Symfony\Component\Console\Input\InputInterface;
use Symfony\Component\Console\Output\OutputInterface;
use Symfony\Component\Console\Style\SymfonyStyle;

use App\MessageBroker;

class JobsFileValidationProducerCommand extends Command
{
    protected static string $defaultName = 'run';

    const EXCHANGE = 'ac_crm';
    const ROUTING_KEY = 'ac.crm.jobs.file.validation';

    private AmqpContext $context;
    private AmqpTopic $exchange;

    /**
     * Setup the command.
     */
    protected function configure()
    {
        $this->setDescription(
            'Publish a jobs file to message broker for deferred validation.'
        );

        $this->context = MessageBroker::context();
        $this->exchange = $this->context->createTopic(self::EXCHANGE);
    }

    /**
     * @param InputInterface $input
     * @param OutputInterface $output
     * @return int
     */
    protected function execute(InputInterface $input, OutputInterface $output)
    {
        $io = new SymfonyStyle($input, $output);

        $fileId = $io->ask('What is the file id?', uniqid());

        $message = $this->context->createMessage(
            json_encode([
                'file_id' => $fileId,
            ])
        );
        $message->setRoutingKey(self::ROUTING_KEY);

        try {
            // publish message to the exchange
            // message has a routing key attached
            // so message broker knows which queue to push to
            $this->context
                ->createProducer()
                ->send(
                    $this->exchange,
                    $message
                );
        } catch (Exception $e) {
            $io->error('Caught ' . get_class($e) . ': ' . $e->getMessage());
            return Command::FAILURE;
        }

        return Command::SUCCESS;
    }
}
Create a shortcut/helper for running this:
./producer:
#!/usr/bin/env php
<?php
require __DIR__ . '/vendor/autoload.php';

use Symfony\Component\Console\Application;
use App\Command\JobsFileValidationProducerCommand;

$application = new Application();
$command = new JobsFileValidationProducerCommand();
$application->add($command);
$application->setDefaultCommand($command->getName(), true);
$application->run();
Running the producer:
$ ./producer

 What is the file id? [5f4bafc8ad065]:
 >
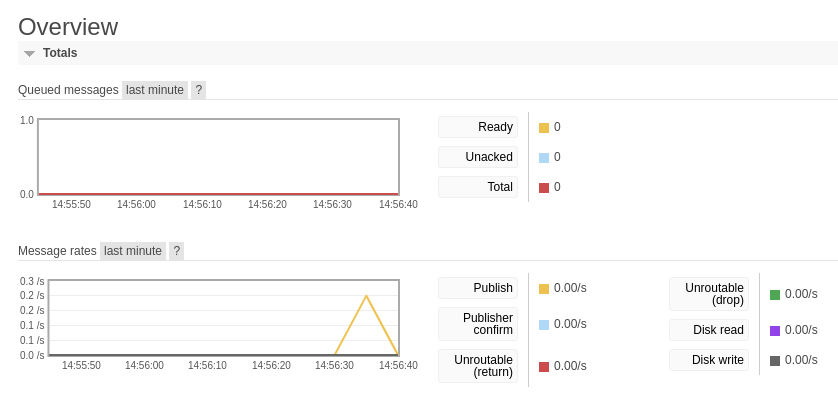
When you look at RabbitMQ management panel you can see the message has been published.

Consumer
Will use a symfony/console command for publishing an example message. This is an interactive demo for illustration purposes only.
<?php

namespace App\Command;

use App\MessageBroker;
use Interop\Amqp\AmqpConsumer;
use Interop\Amqp\AmqpContext;
use Interop\Amqp\AmqpMessage;
use Symfony\Component\Console\Command\Command;
use Symfony\Component\Console\Input\InputInterface;
use Symfony\Component\Console\Output\OutputInterface;
use Symfony\Component\Console\Style\SymfonyStyle;

class JobsFileValidationConsumerCommand extends Command
{
    protected static string $defaultName = 'run';

    const QUEUE = 'ac_crm_jobs_file_validation';

    private AmqpContext $context;

    /**
     * Setup the command.
     */
    protected function configure()
    {
        $this->setDescription(
            'Validate a jobs file from the queue in message broker.'
        );

        $this->context = MessageBroker::context();
    }

    /**
     * @param InputInterface $input
     * @param OutputInterface $output
     * @return int
     */
    protected function execute(InputInterface $input, OutputInterface $output)
    {
        $io = new SymfonyStyle($input, $output);

        $queue = $this->context->createQueue(self::QUEUE);
        $consumer = $this->context->createConsumer($queue);
        // waits until message is available
        $message = $consumer->receive();

        try {
            $this->process($consumer, $message, $io);
        } catch (\Exception $e) {
            $io->error('Caught ' . get_class($e) . ': ' . $e->getMessage());
            return Command::FAILURE;
        }
        return Command::SUCCESS;
    }

    /**
     * "Validate" the file from message content.
     *
     * @param AmqpConsumer $consumer
     * @param AmqpMessage|null $message
     * @param SymfonyStyle $io
     */
    private function process(
        AmqpConsumer $consumer,
        ?AmqpMessage $message,
        SymfonyStyle $io
    ) {
        $messageBody = json_decode($message->getBody(), true);

        // TODO: fetch file from S3/whatever and validate its content, etc.

        $io->comment('Message content:');
        $io->table(array_keys($messageBody), [array_values($messageBody)]);

        $wait = $io->ask('How long (seconds) will this take to "process"?', 5);

        // Simulate validation
        sleep($wait);

        $success = $io->ask('Was this "process" completed?', true);
        $success = (bool) $success;

        if ($success) {
            $io->success('Sending acknowledgement!');
            $consumer->acknowledge($message);
        } else {
            $io->error('Sending rejection!');
            $consumer->reject($message, false);
        }
    }
}
Create a shortcut/helper for running this:
./consumer:
#!/usr/bin/env php
<?php
require __DIR__ . '/vendor/autoload.php';

use Symfony\Component\Console\Application;
use App\Command\JobsFileValidationConsumerCommand;

$application = new Application();
$command = new JobsFileValidationConsumerCommand();
$application->add($command);
$application->setDefaultCommand($command->getName(), true);
$application->run();
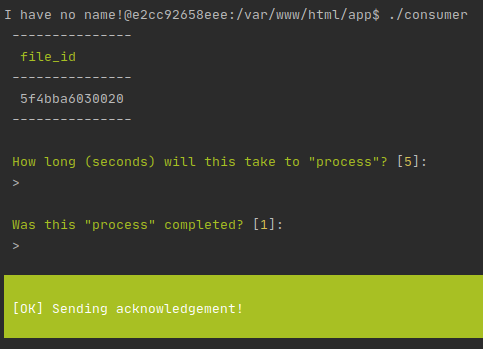
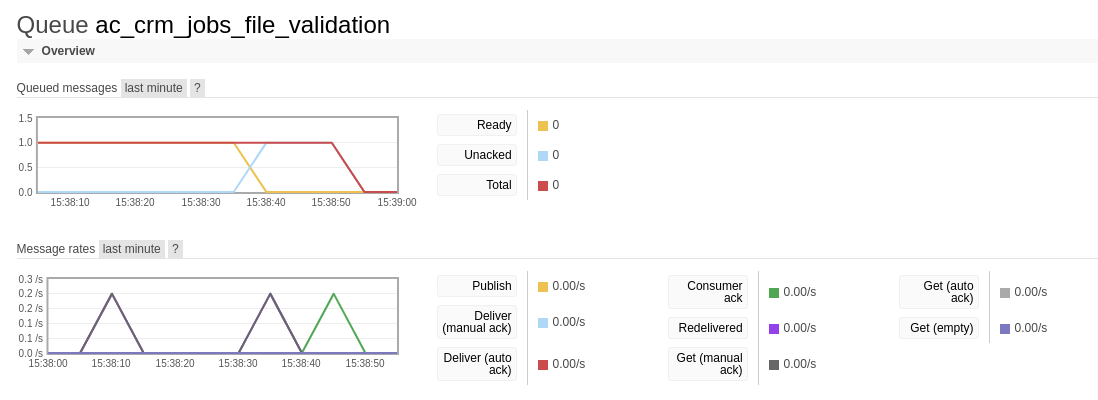
Example of consumer acknowledging processing of the message has been satisfied.
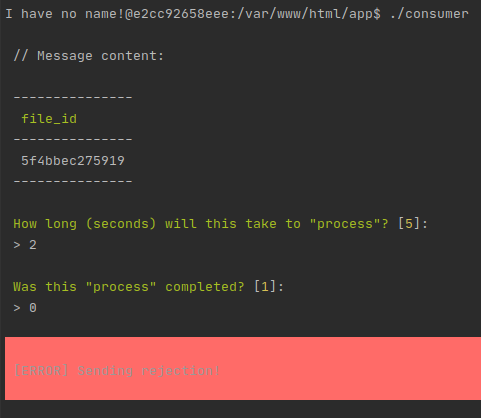
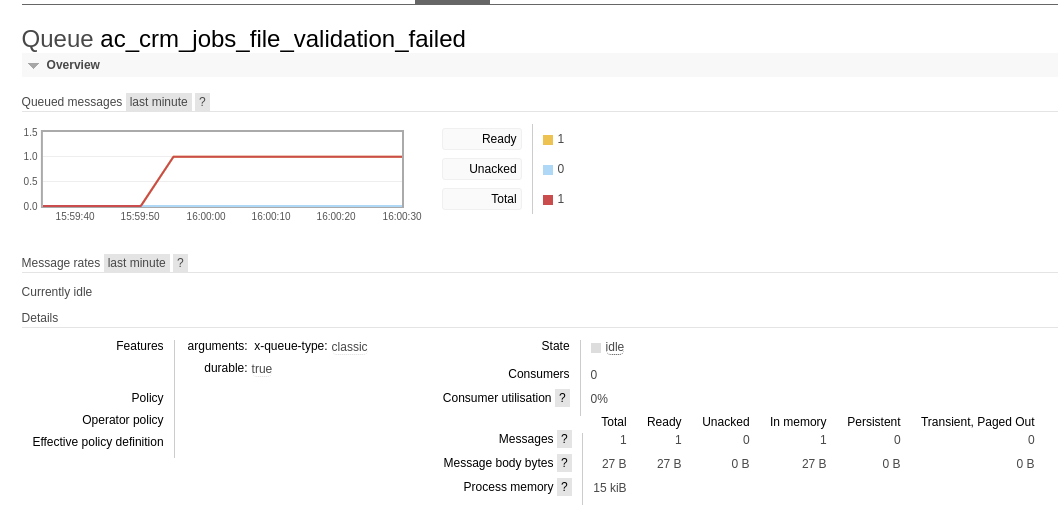
Example of consumer rejecting because processing of the message is not satisfactory, i.e. something went wrong.
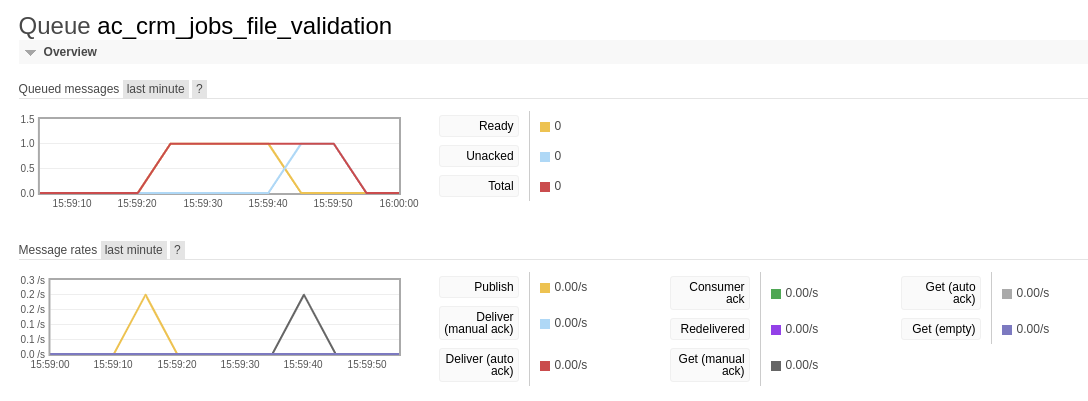
And with the dead-letter exchange we have configured, rejected messages from this queue are automatically placed into the other queue.
Always have a consumer running in the background with supervisord
Note: Go to non-interactive branch for this section.
Since our worker:
- Waits for message
- Does work with this message
- Exit
This means the worker will exit when just one message has been processed. We will want supervisord to restart the program when it has no processes running. While we could have the consumer worker running in an infinite loop, this could be problematic for tasks which take a long time.
Once you install supervisord we will create a new configuration file for our worker.
By default, supervisord will load all *.conf files in /etc/supervisor/conf.d, so we will create a file per program within this folder. More information on program configuration.
/etc/supervisor/conf.d/ac_crm_consumer.conf:
[program:ac_crm_consumer]
command=/usr/bin/docker exec -i -w /var/www/html/app ac_crm ./consumer
autorestart=true
Then
sudo supervisorctl reload
The messages will be being consumed continuously now. The current consumer has a 3% chance of rejecting a message.
You can verify a few different ways:
- Look at RabbitMQ admin panel
- Look at
/var/log/syslogor whatever
supervisord[75871]: INFO exited: ac_crm_consumer (exit status 0; expected)
supervisord[75871]: INFO spawned: 'ac_crm_consumer' with pid 800935
supervisord[75871]: INFO success: ac_crm_consumer entered RUNNING state, process has stayed up for > than 1 seconds (startsecs)
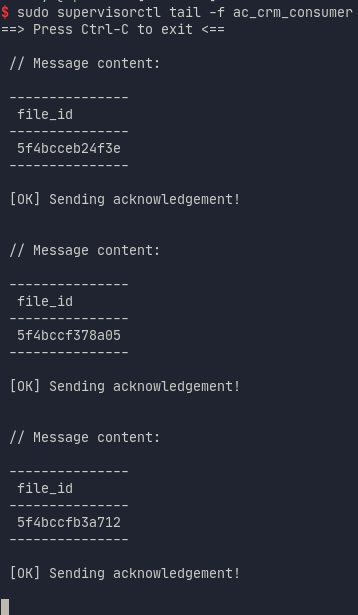
Better:
sudo supervisorctl tail -f ac_crm_consumer
Better:
- Configure
ac_crm_consumer.confbetter - Configure and look at
supervisorctlweb UI
Create /etc/supervisor/conf.d/web_ui.conf:
[inet_http_server]
port = 127.0.0.1:9001
username = user
password = 123
Will look like this without anything configured:

With the worker in place for the consumer:

Publish a few mesasges with the non-interactive producers:
$ docker exec -it -u $(id -u) -w /var/www/html/app ac_crm ./producer
Publishing message for file: 5f4bcceb24f3e

$ docker exec -it -u $(id -u) -w /var/www/html/app ac_crm ./producer
Publishing message for file: 5f4bccf378a05

$ docker exec -it -u $(id -u) -w /var/www/html/app ac_crm ./producer
Publishing message for file: 5f4bccfb3a712
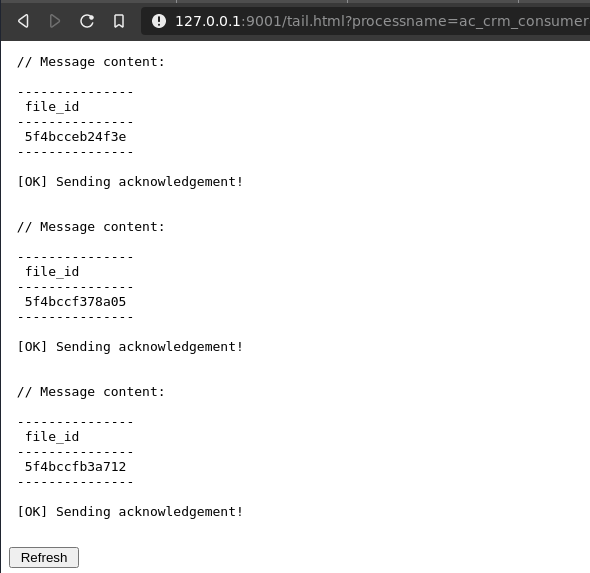
We can click on the program to see the logs
